

Project: Les Paul Standard Custom Build
A Guitar-Building Adventure in The Insomniac Workshop

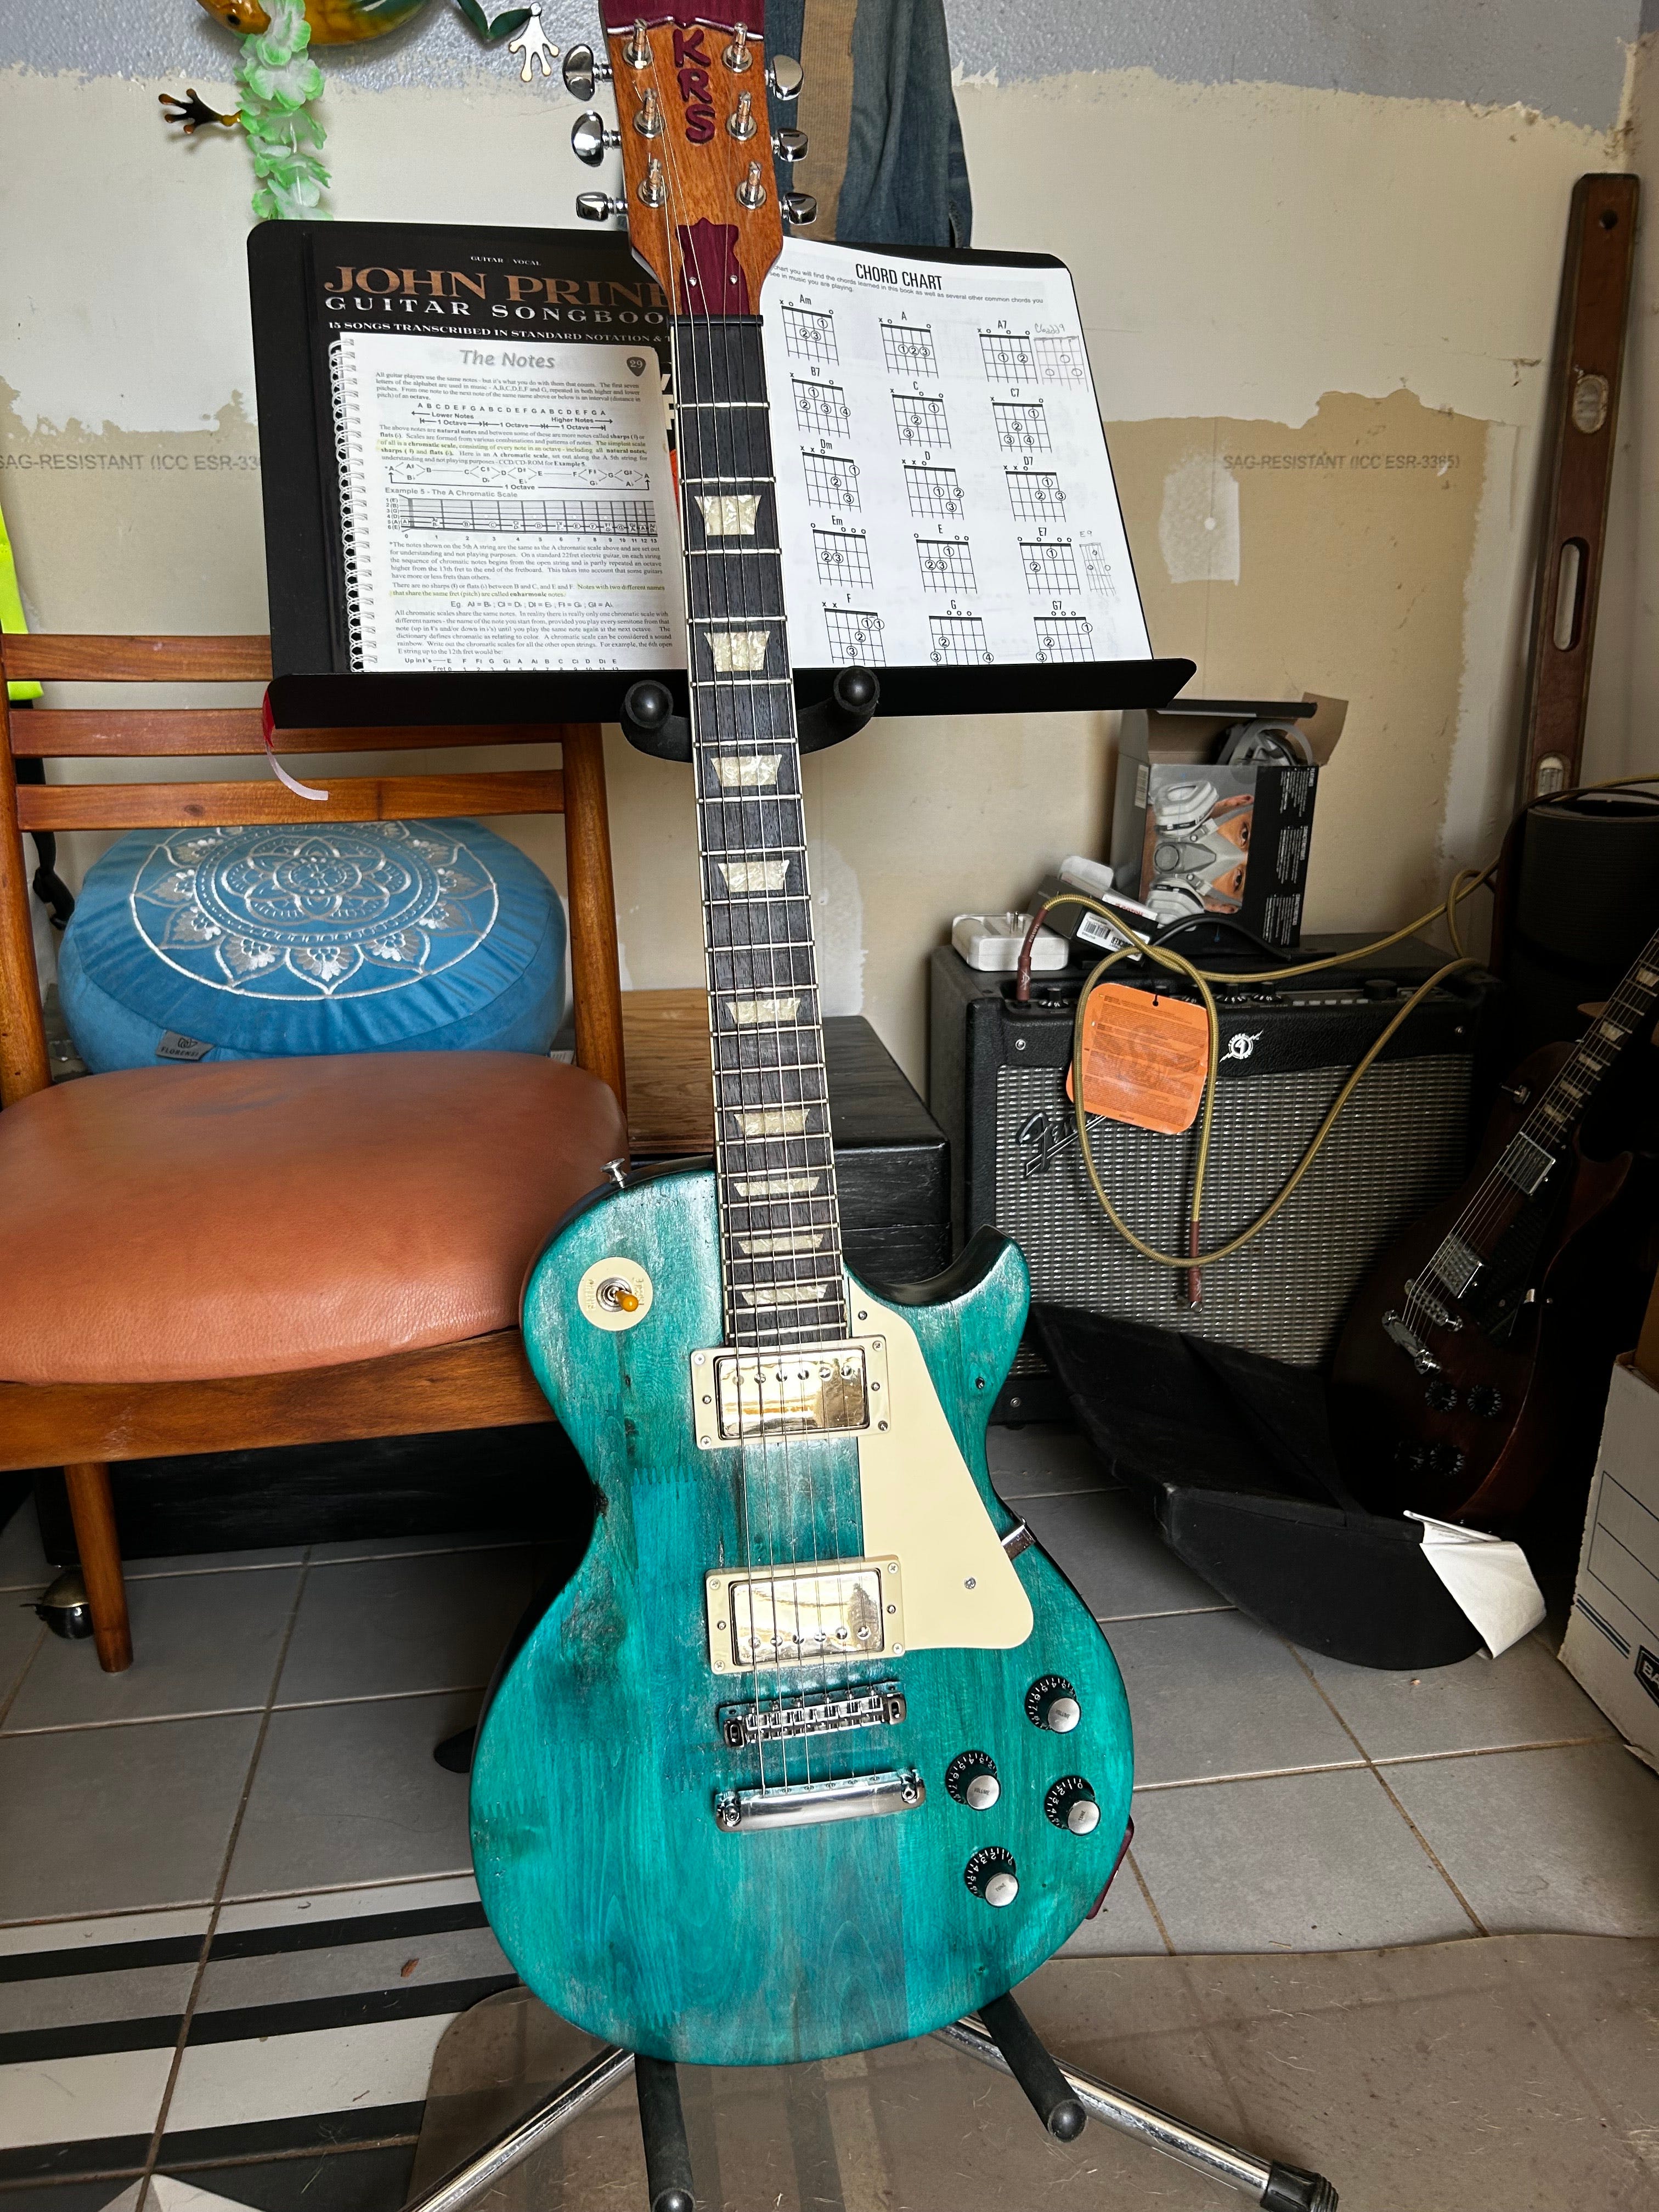
The finished product — a Gibson Les Paul inspiration build with my own quirks.
I’ve included links from sites like Amazon for your convenience if you are reading this for tips on your own custom build. I am not a luthier but just a woodworker anal about details, so, if my hard-gained lessons-learned can help, then mission accomplished. You’re welcome.
This is a wee bit of a long read perhaps, and sorry in advance to those casual-yet-welcome net surfers. I’m fond of my rabbit hole here. The reason for the longwindedness of this article is for the benefit of the serious musician or woodworker that is looking for useable tips on building a guitar from a kit that’s really playable and not a toy or hipster living room display. (No offence to hipsters.)
Like most people, I’ve got a project backlog. Part of it lives in my head but another part of it is physical — my shop becomes incrementally crowded with “stuff” that has been patiently waiting for inspiration and assembly. One might think it is hard for me to keep track of it all, given that although I consider myself to be a rather bright fellow, I am also seemingly-incurably scatterbrained, forever gathering wool. And yet, I constantly remind myself to practice mindfulness. Quandry.
However… due to the nature of my shop, The Insomniac Workshop, I keep running into squirreled-away items when I am searching for something else. This is how I got busy with my Les Paul Standard-ish custom build. While sleuthing around for a small sheet of Plexiglas for a completely different diversion, I found the guitar body and neck, patiently waiting. Sadly gathering dust…
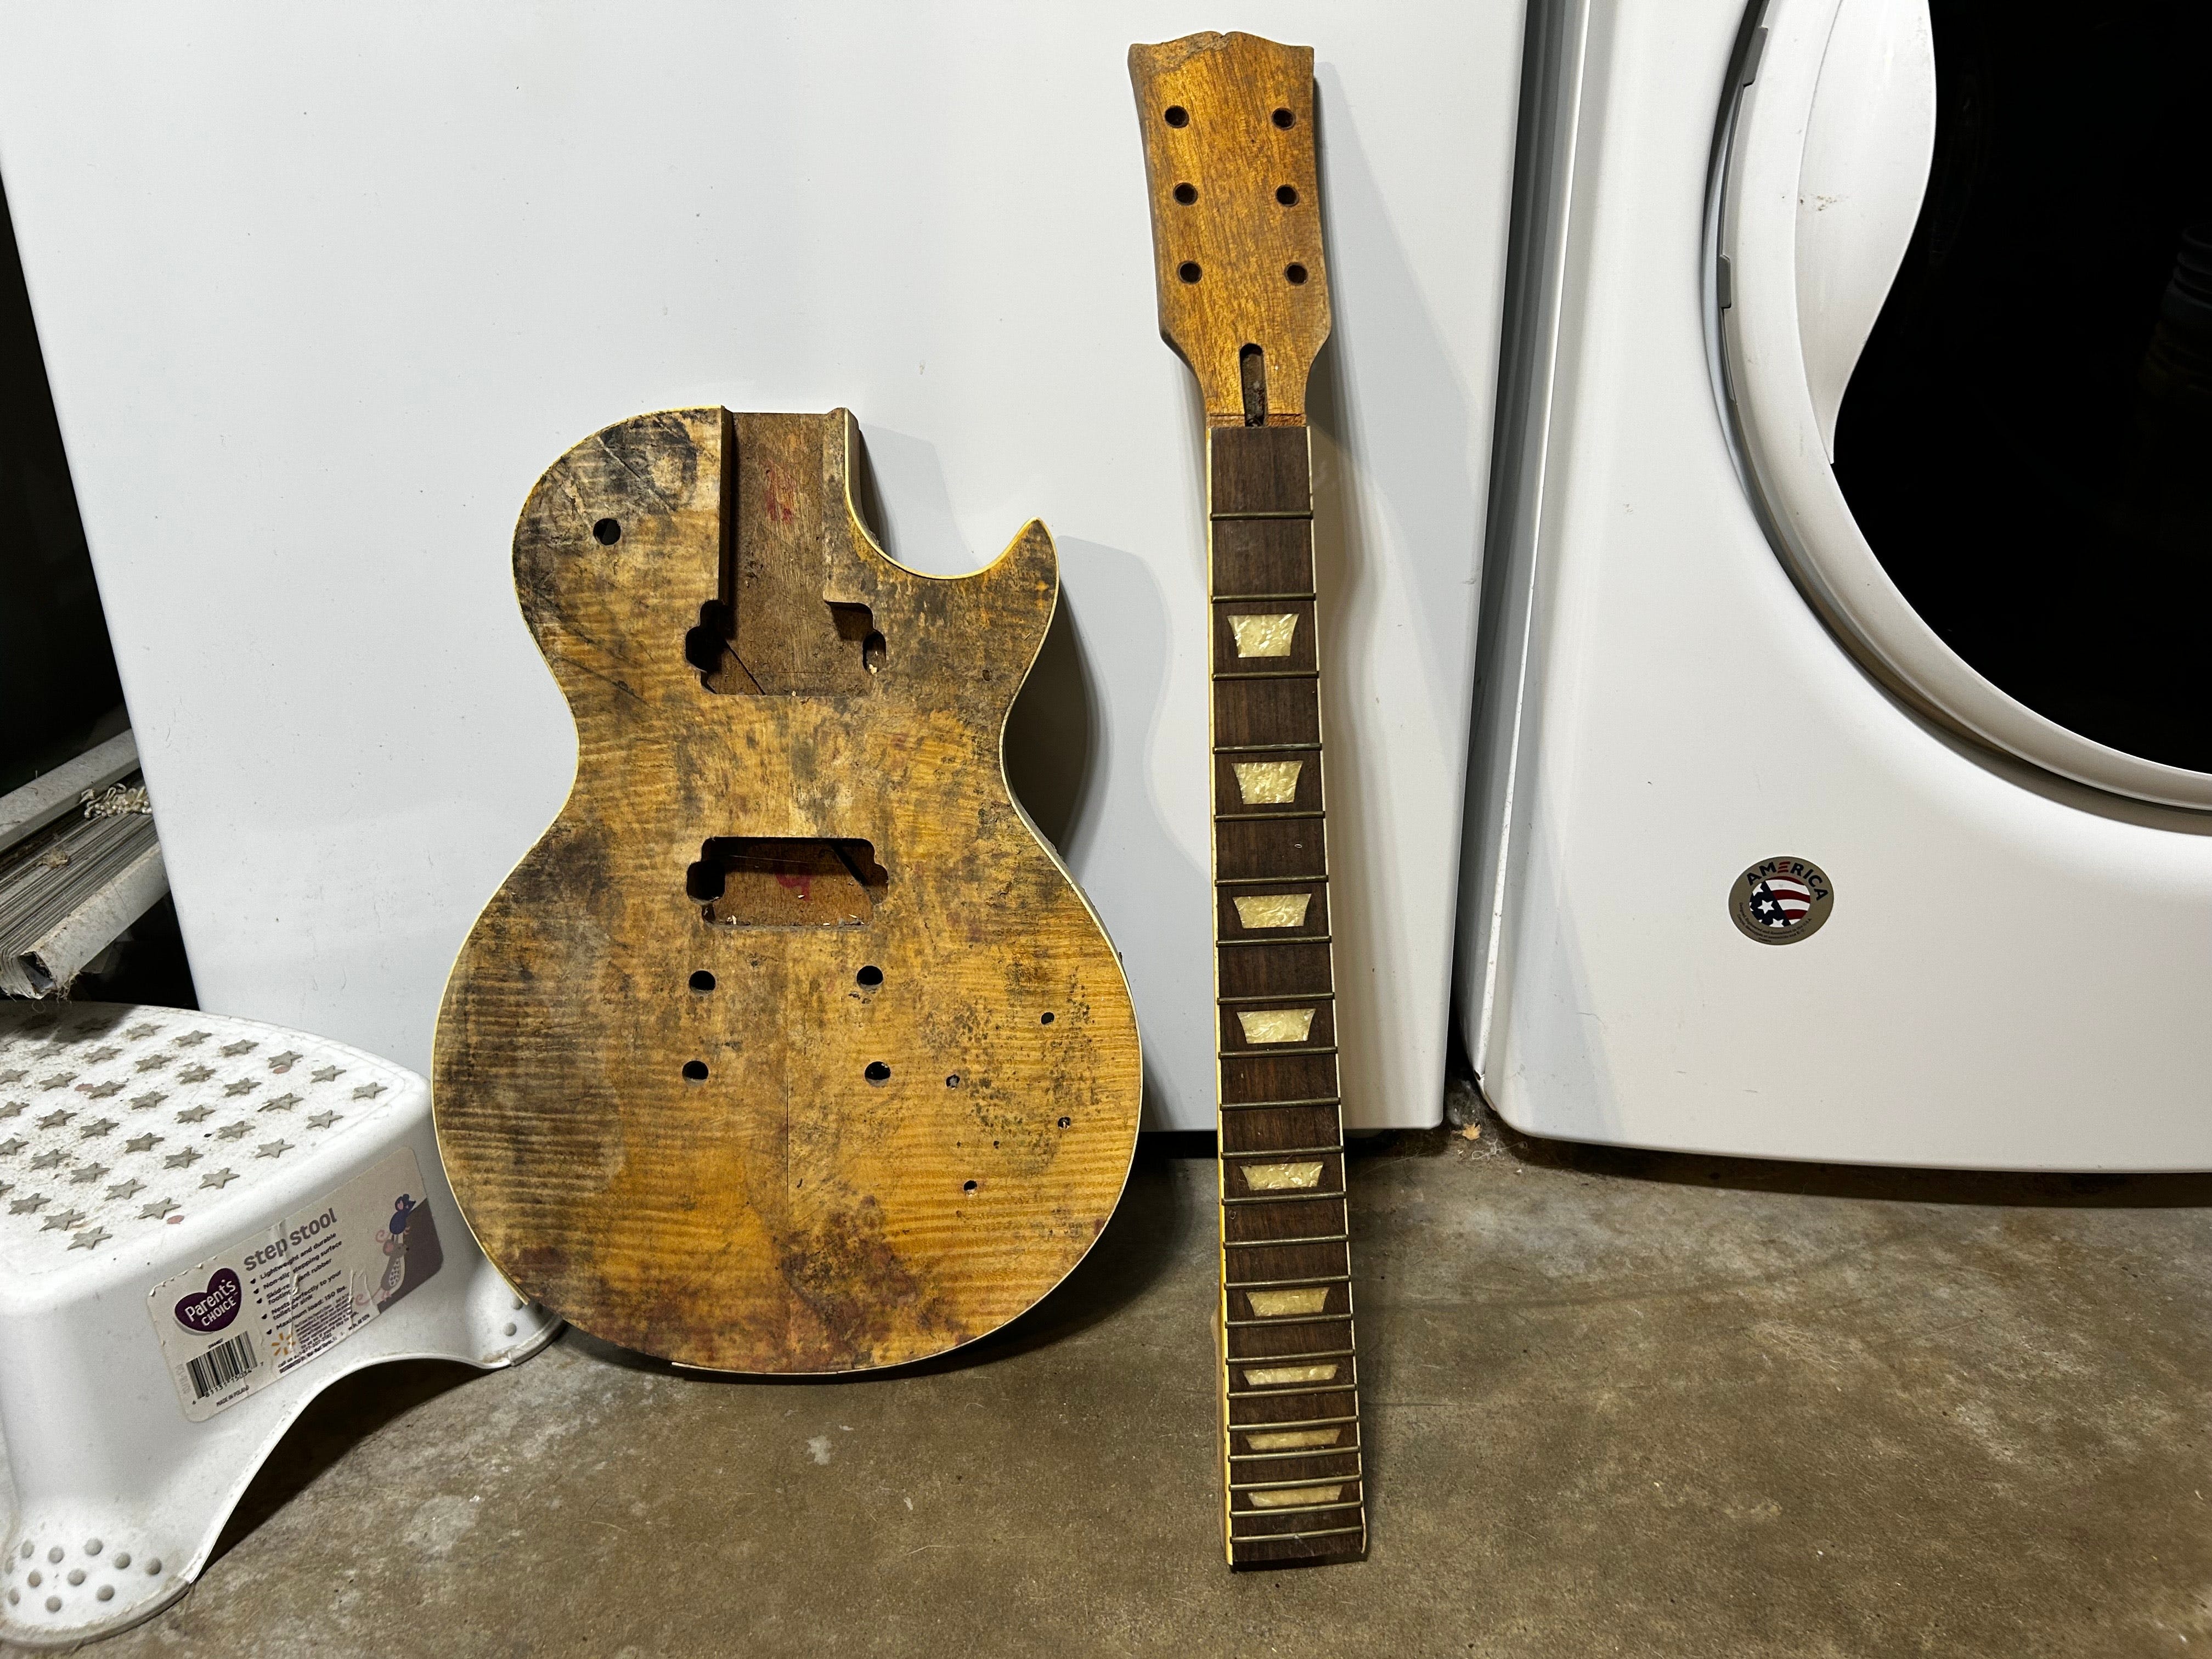
Distressed Les Paul Standard body and neck
I bought the guitar kit back in 2012 from BYO Guitar and it has been waiting ever since. The body and neck are full of potential; the body is mahogany with a maple cap. Even in the picture above you can see what seems to be beautiful maple grain on the body and headstock. I intended to replace the cream-color binding on the body, but the binding on the neck adjacent to the fretboard is in reasonable shape, with the exception of a tiny chip at the bridge end, which is an easy cosmetic fix.
How to Sharpen Knives to a Razor’s Edge
At the time of the purchase I had ponied up the premium fee and upgraded the Crapola tuners to a set of Grover Locking Rotomatics but the rest of the components — wiring harness, pickups, etc., didn’t really do this fine wood justice. If I had been born in the long-ago and the far, far, away, I would likely be a Druid. I like wood that much.
Granted, the neck and body look really bad now but I wasn’t too worried; everything was generously anointed with a sanding sealer at the factory. At the time I appreciated that professional foresight, not knowing future humidity conditions. In retrospect it was more professional-grade window dressing. By the way, last I checked, BYO Guitar does not offer the “Electric Guitar Kit - LP Std” anymore that I can see. Perhaps Gibson got onto them for some sort of name or trade infringement? Who knows? We live in a silly, litigious world, don’t we?
Parts List for my Gibson Les Paul-ish Build
I was aiming to go for the Gibson Les Paul style because I already own a Les Paul Studio model that I really like. As a bonus, I could use that as a reference since this was my first guitar build.
The list (tuners not included because I already had them):
(12) Humbucker mounting ring screws
(4) Top hat knobs
Toggle switch plate
Graph Tech Black TUSQ XL nut, for Gibson, slotted, pre-2014 (this nut is so friendly to the strings; very slick for easy tuning and bending)
Bringing the Neck and Headstock Back to Life
A quick go-over of the neck with a fretboard straightedge brought a bit of relief as it revealed it to be true in both directions. It is so much better not to have to start out tweaking, keeps things simple. At this point no adjustment was needed but I did check the truss rod and found that in moved freely. Another good sign. The first order of business was to repair that binding chip.
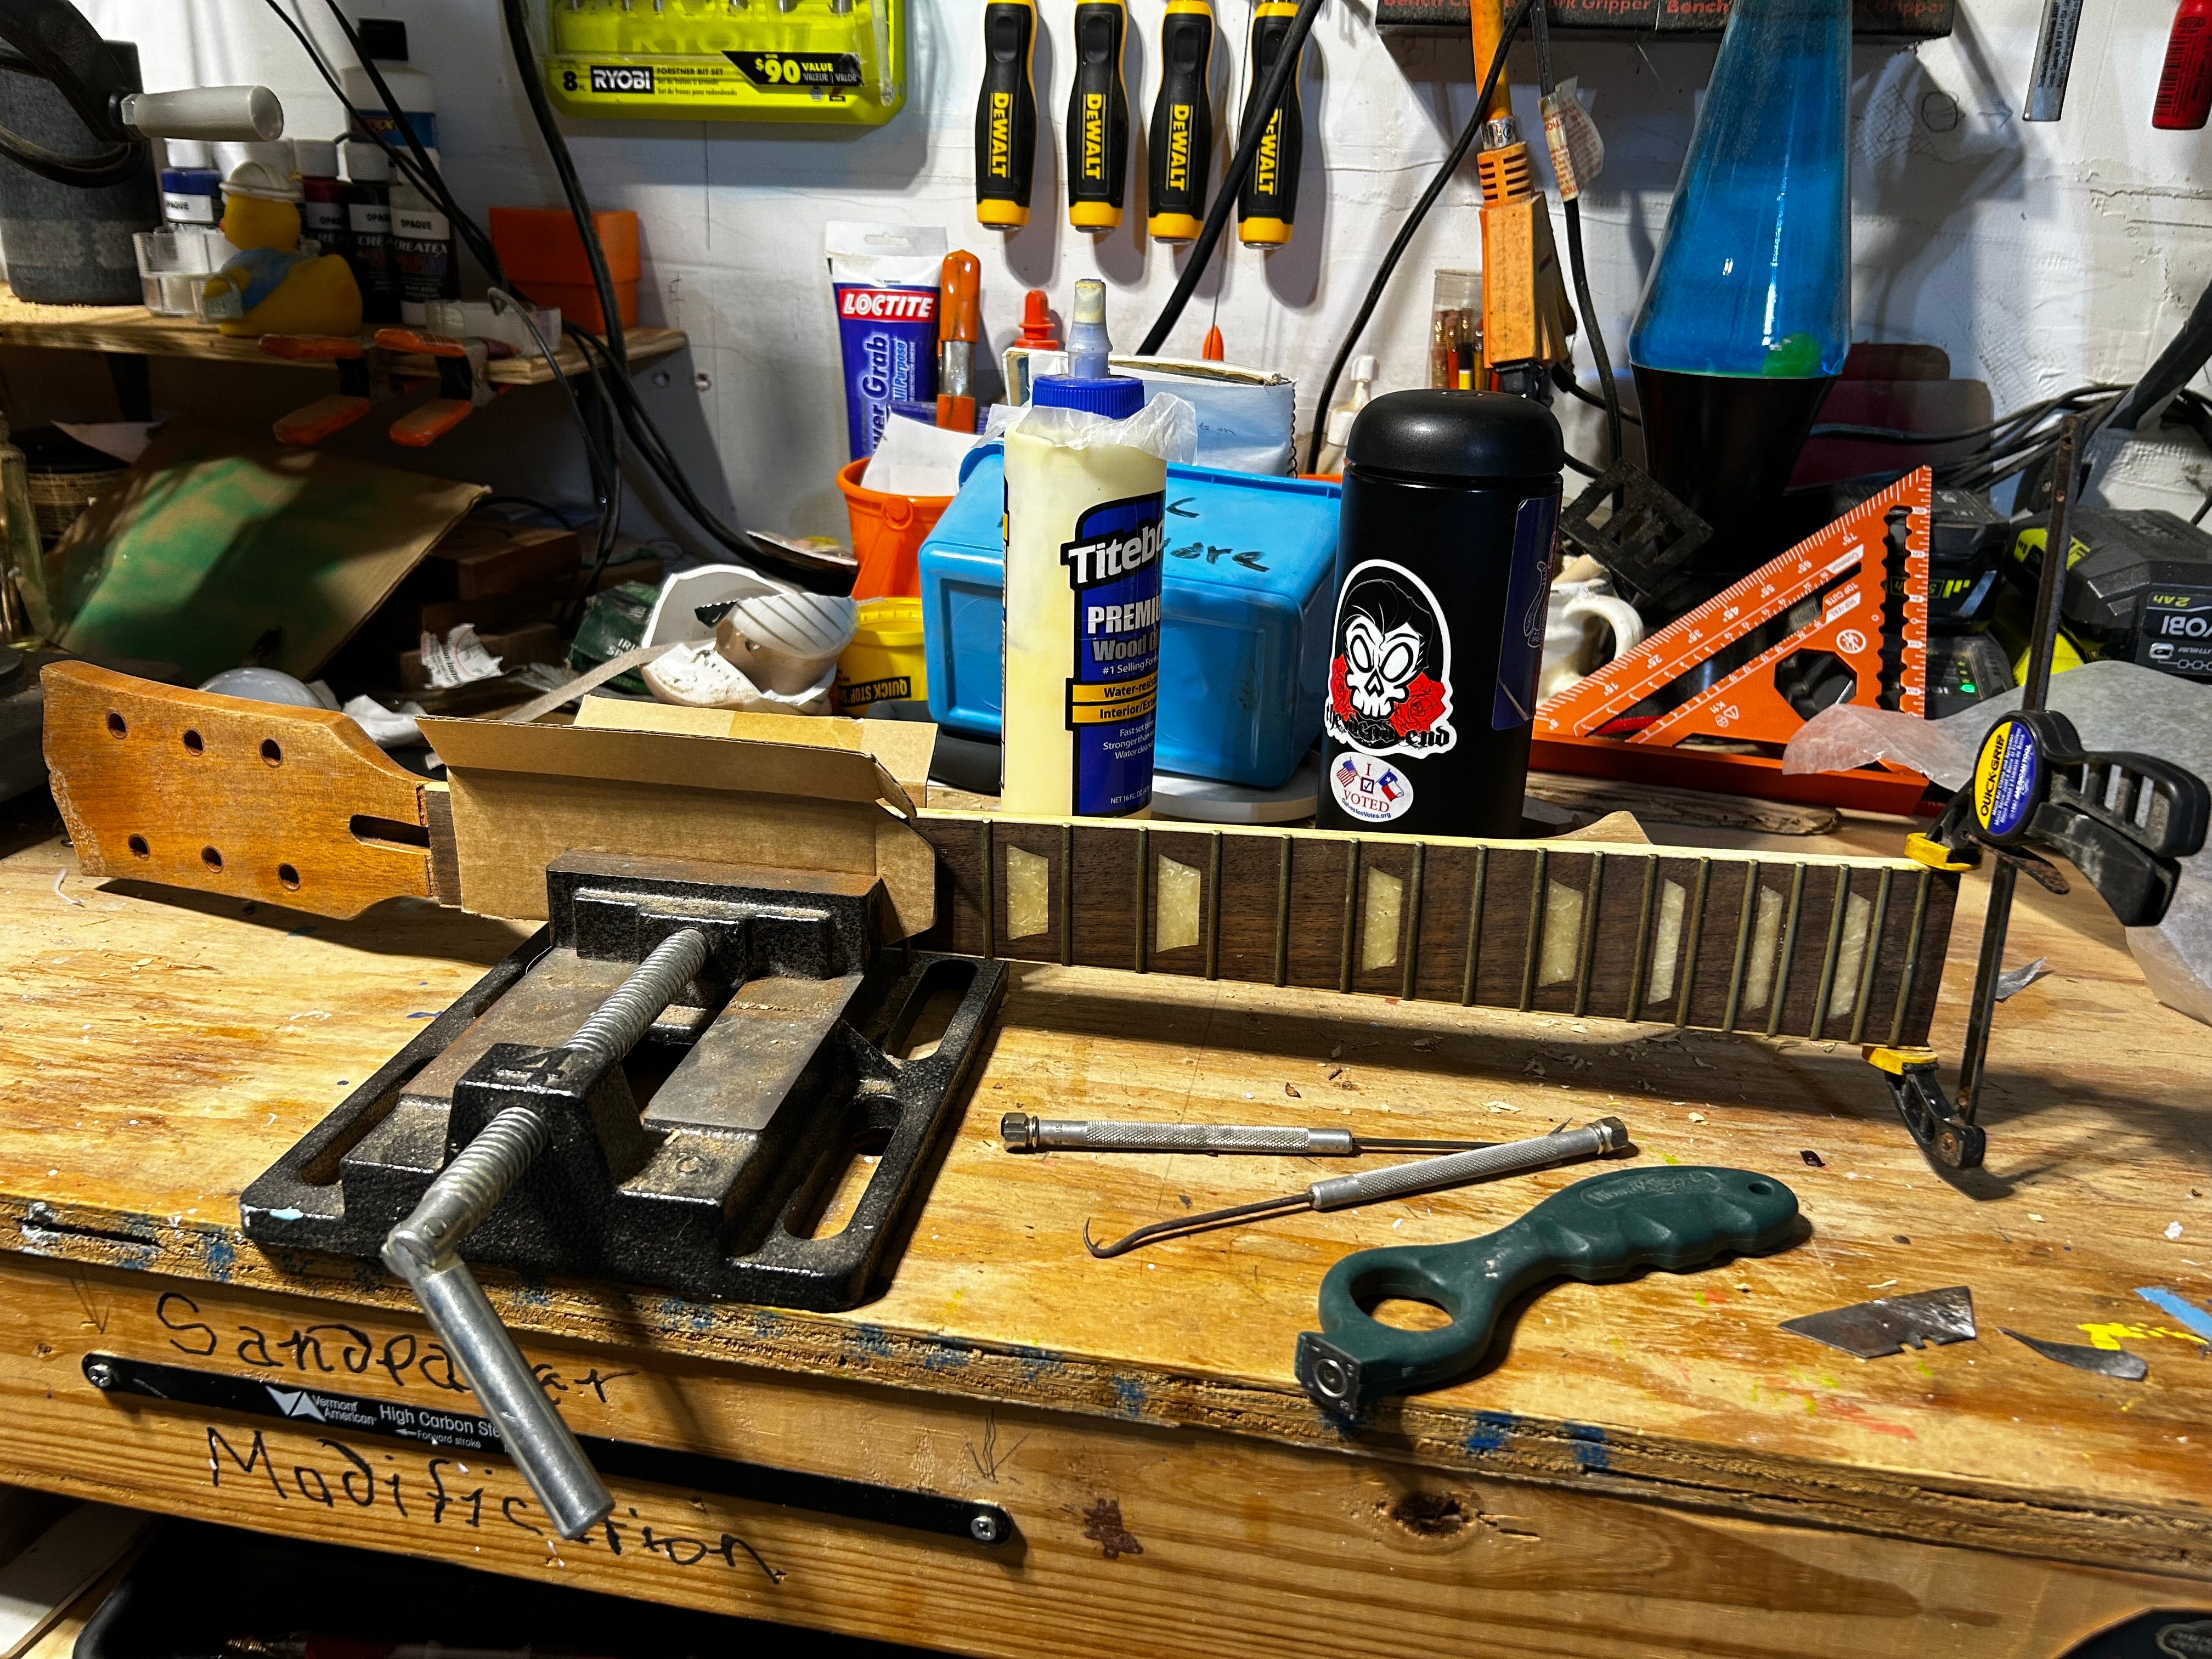
Patching a wee bit of binding on the end of the neck.
I used Titebond glue and left the glue-up clamped overnight. The humidity in my shop is in the neighborhood of 80% humidity so I just give everything extra time. As soon as I get to it I will begin sanding.
Rockler Sign Making Template Review
* A general note on my sanding protocol — I begin with 60 grit and progressively work every increment up to 1500 grit. There is no skipping grit progression, for several reasons that are beyond the scope of this narrative and your patience. It is tedious, granted, but it is the only method I know of getting a glass-like finish on hardwoods like the purpleheart I am using on this build.
As I said before, the factory had been liberal with the sanding sealer. On the plus side, the wood, body and neck, were preserved somewhat from fluctuating humidity, etc. On the negative side, the coating had really become hard with age. It quickly became apparent that I was going to have to wet-sand with 60 grit, something I am loath to do because of the inevitable mess. But it is what it is.
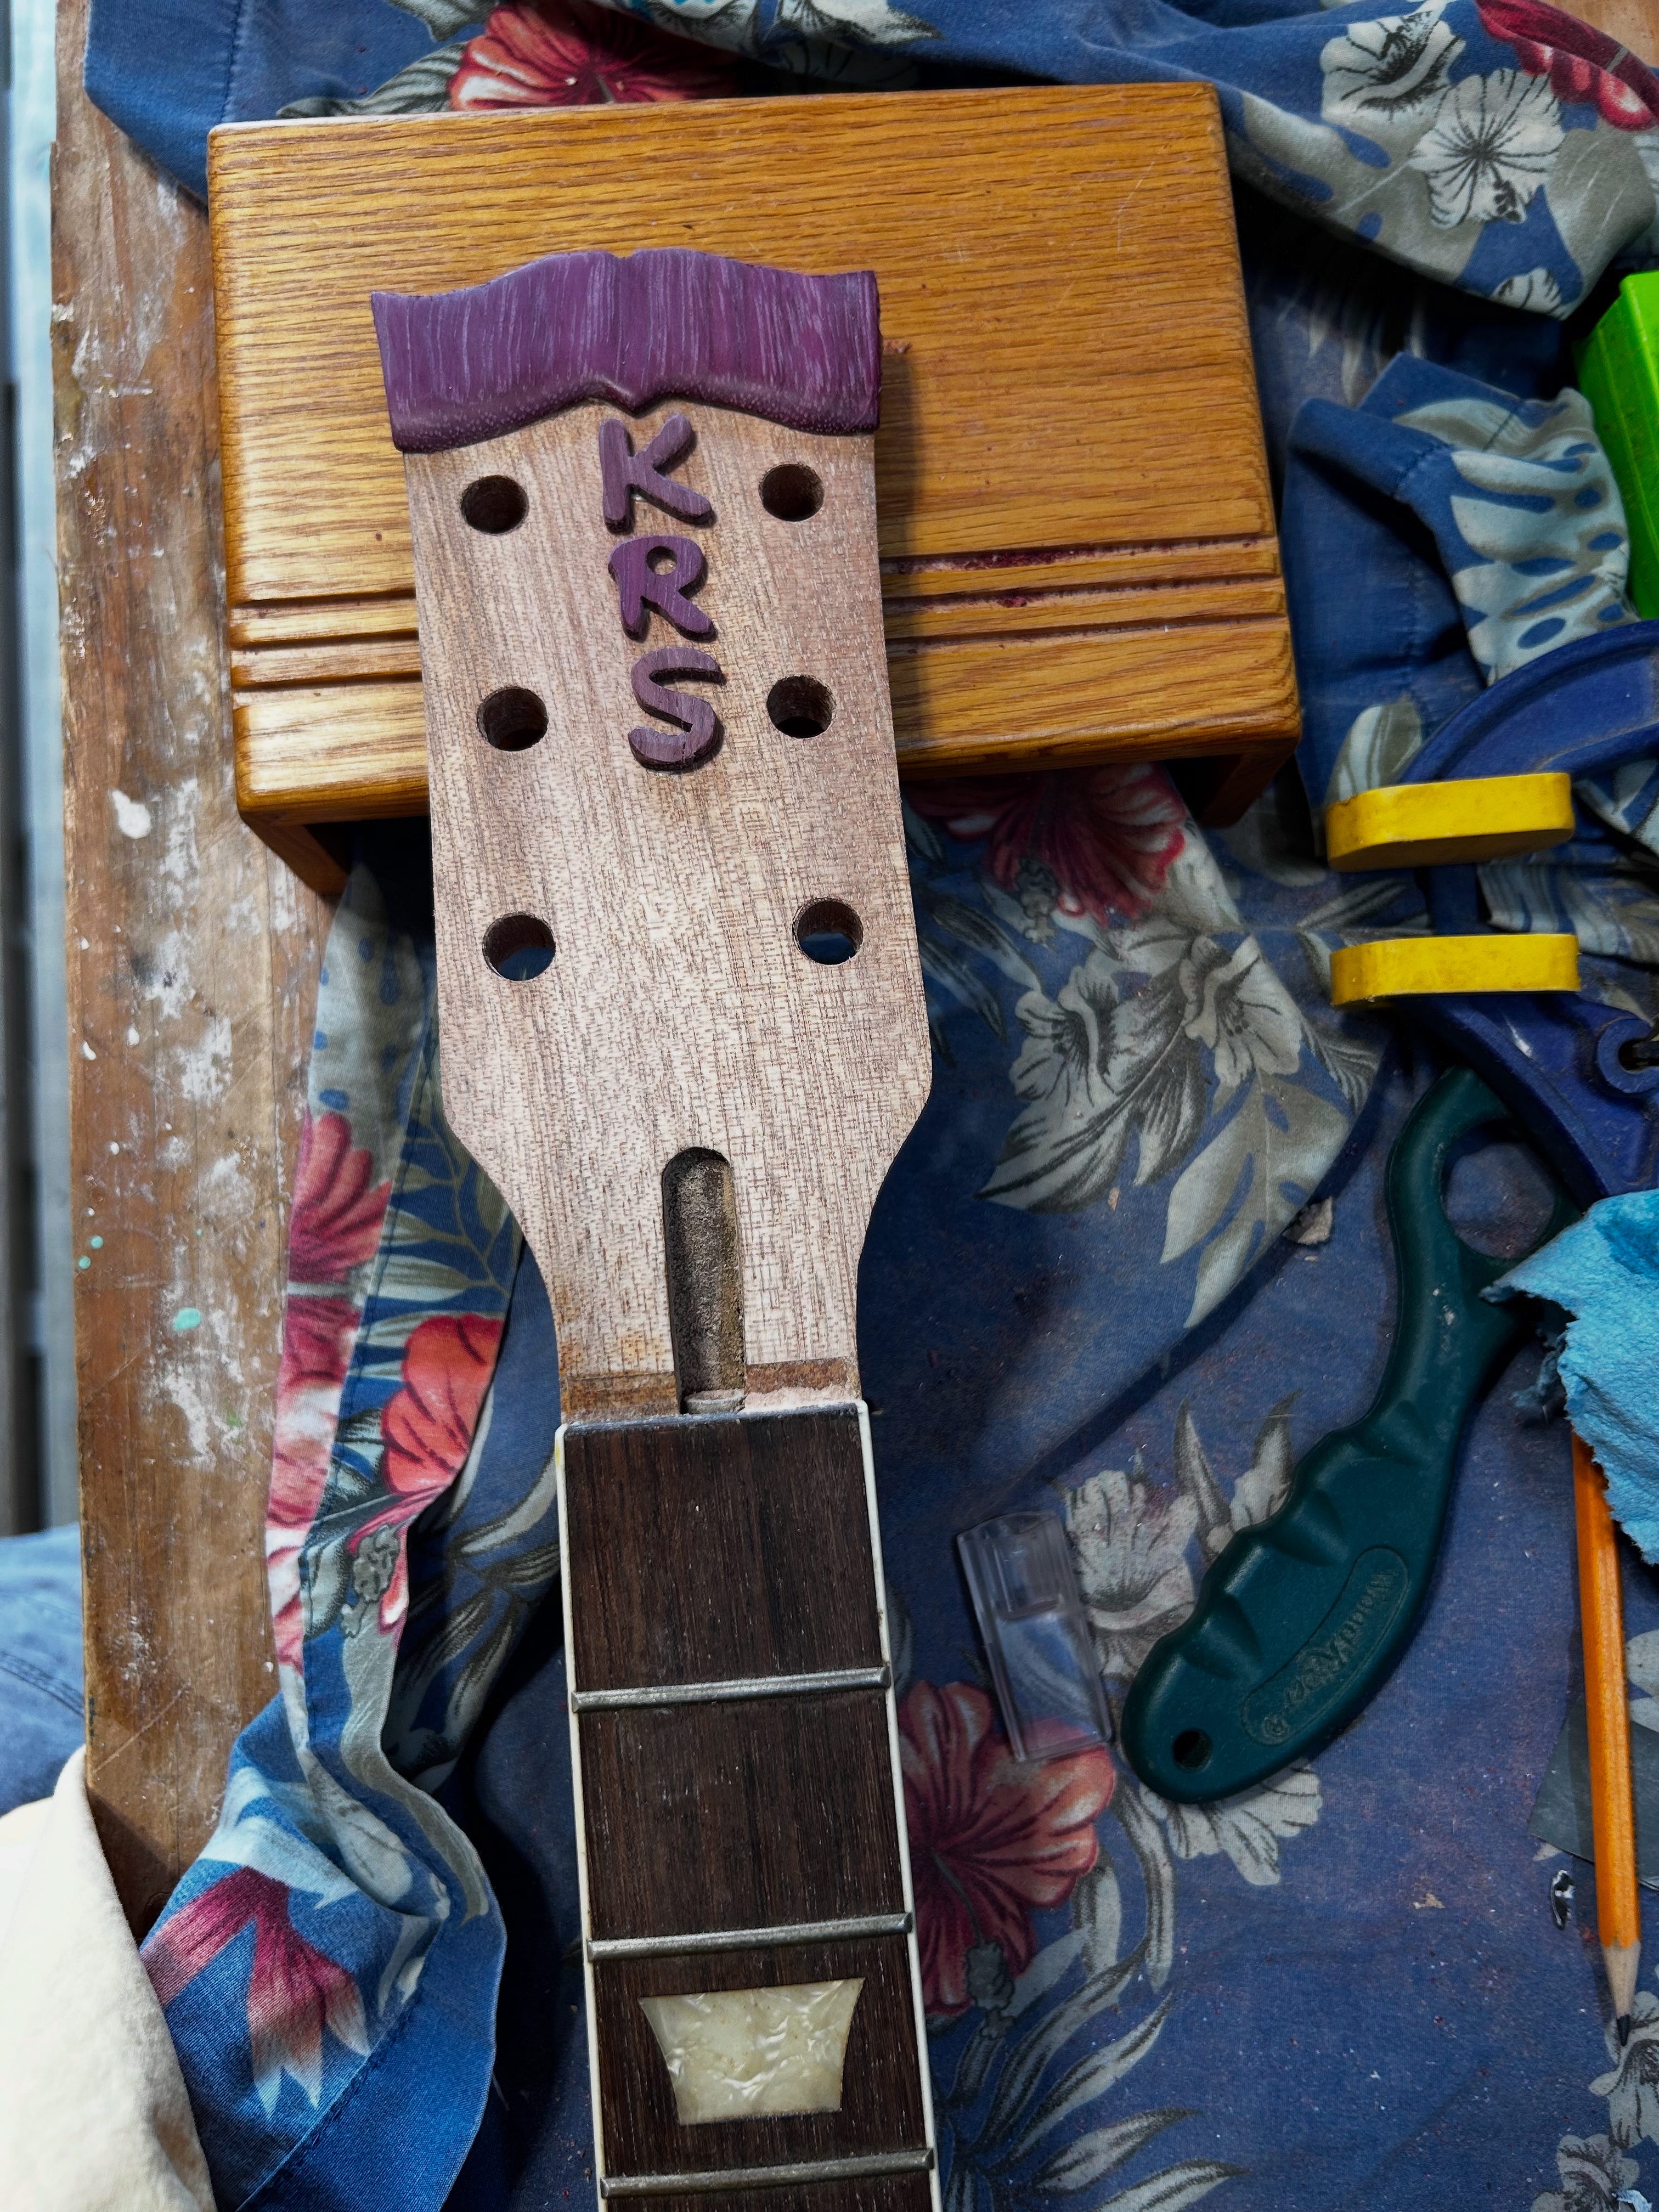
Preparing the Headstock and Neck
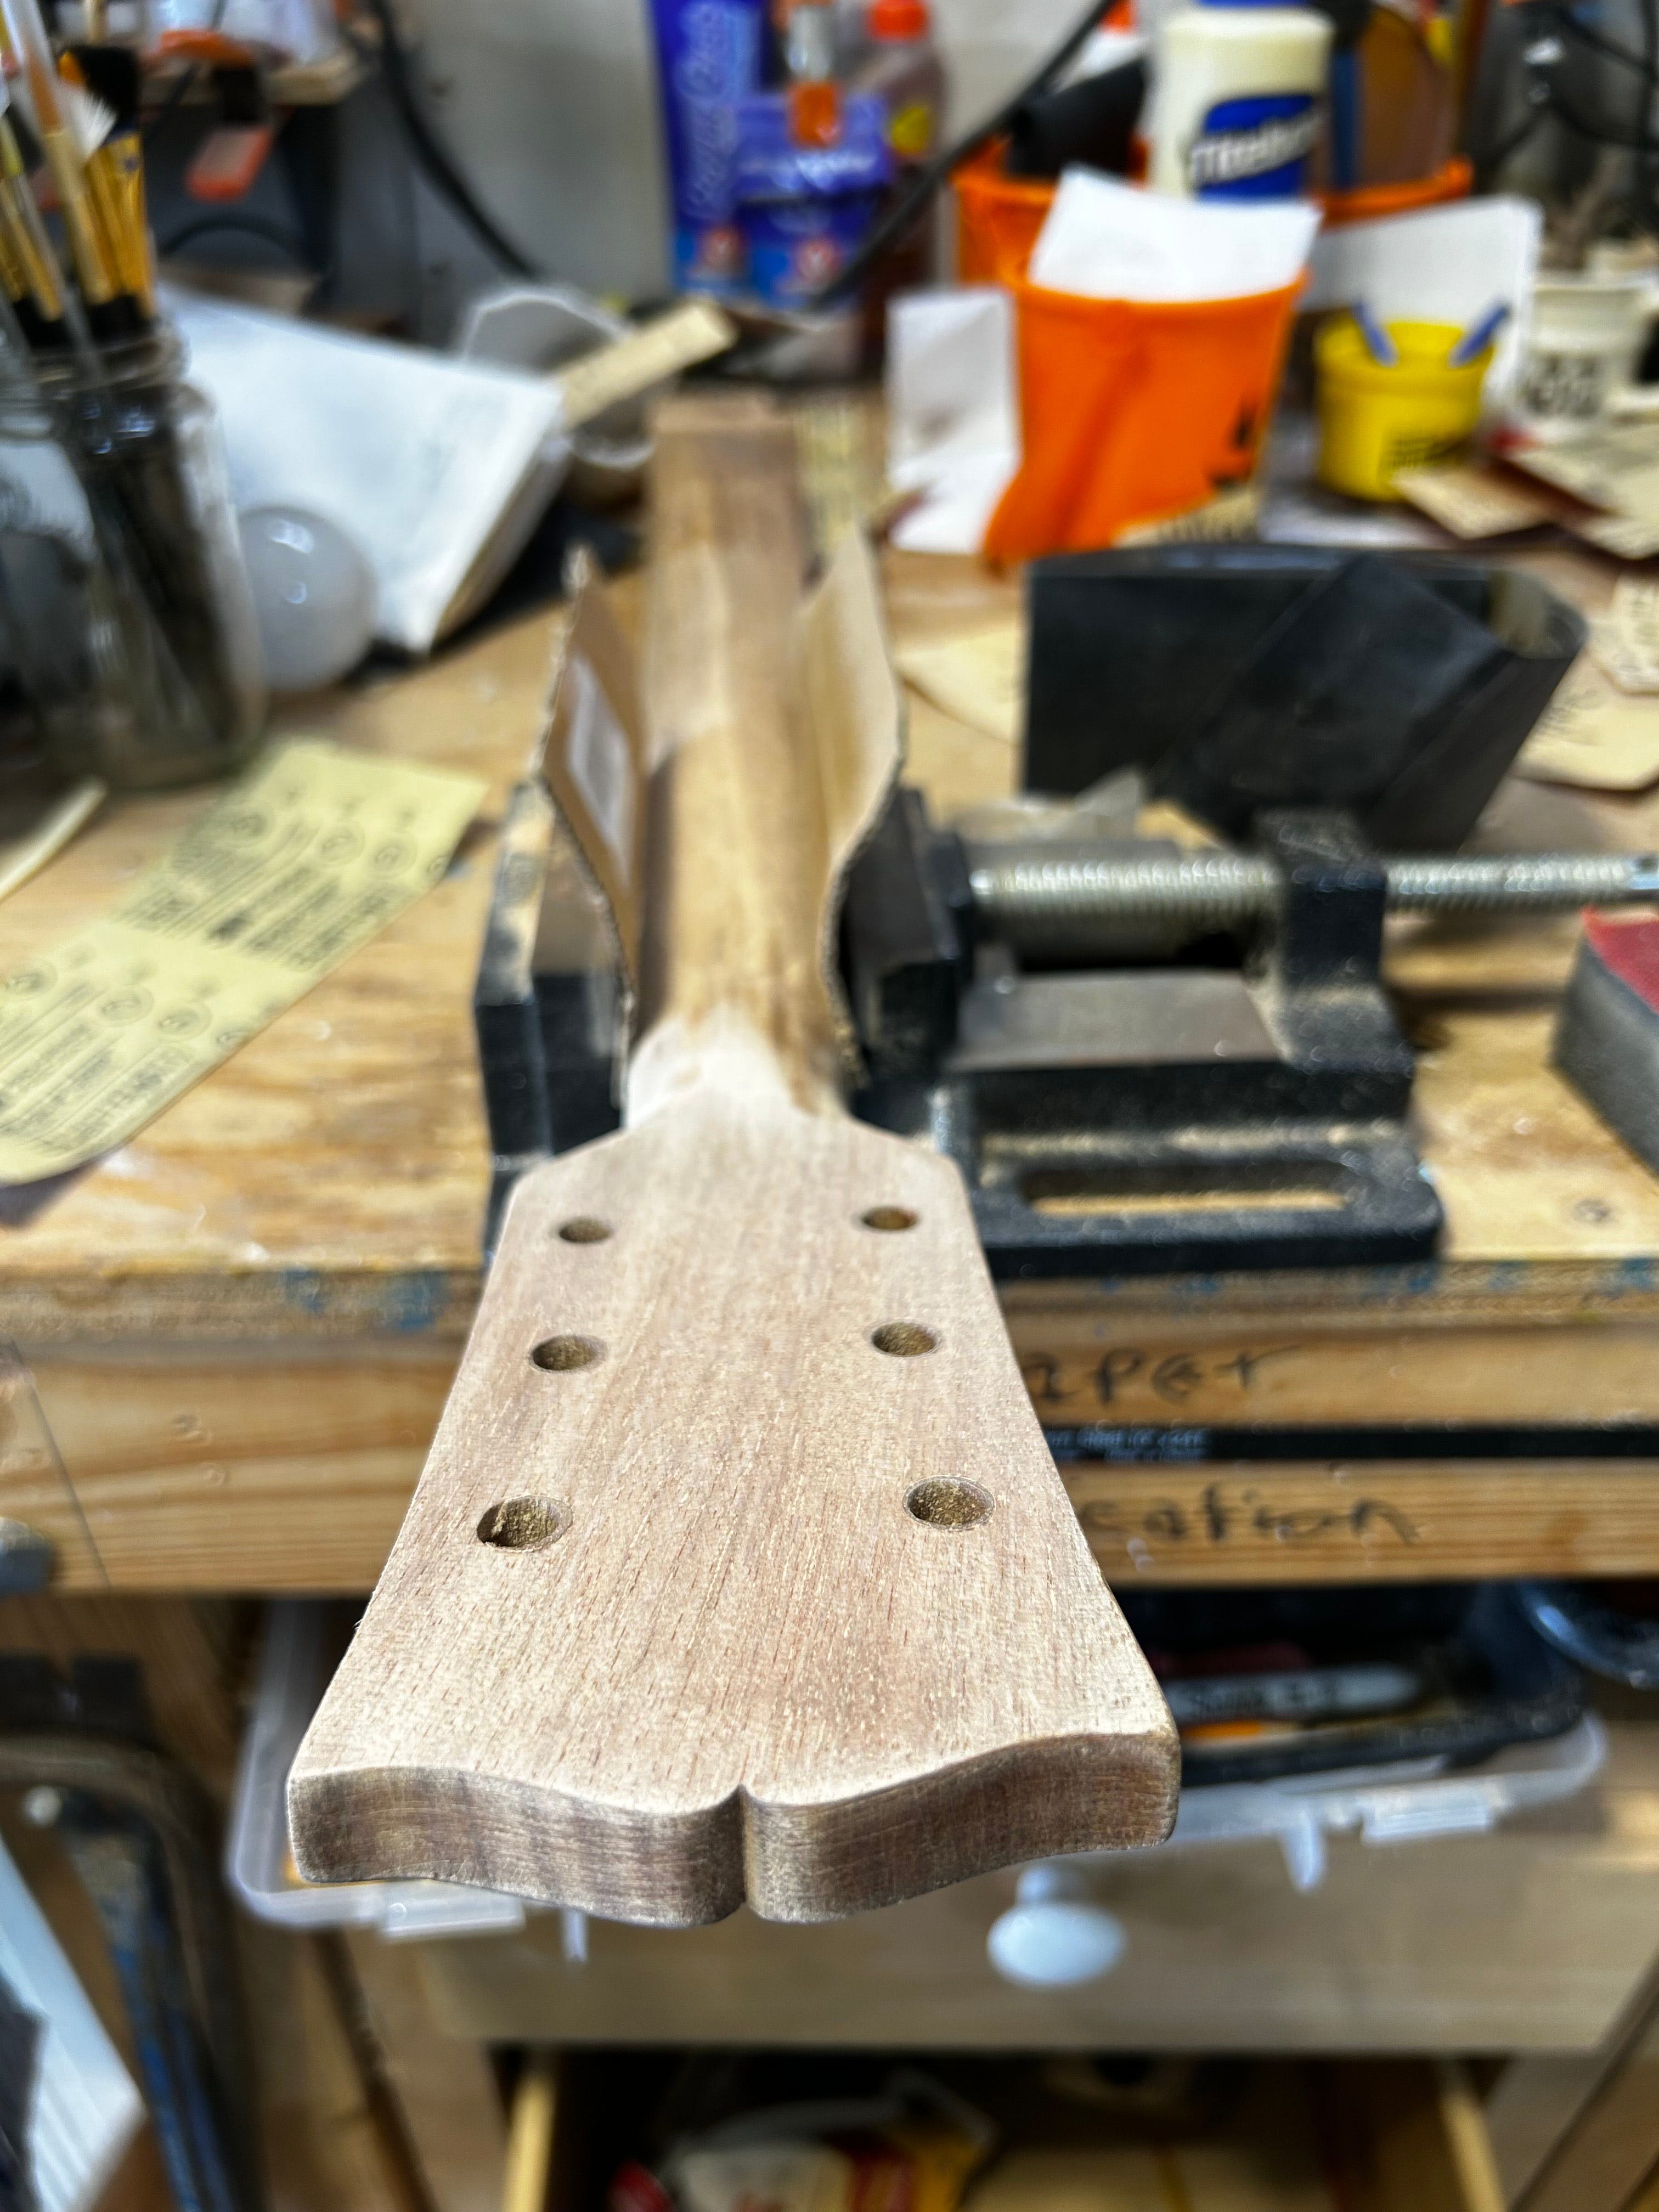
Look at the fine grain of that wood.
Note on the holes for the tuning pegs; do you see the inset ring of darker wood if you look very close? The holes had originally been drilled for the standard size that Grover uses but apparently the contractor-grade tuners were smaller so the BYO boys had glued, plugged, and re-drilled. So, I used a Forstner bit to redrill the plugs again. So many manhours spent to correct a mod done to use crapola tuning pegs to save money. The irony hardly escapes me.
Most guitars use inlay decorations exclusively but I really wanted to use intarsia patterns, (don’t judge; I’m not selling this guitar anyway) and so I settled on a cap and my initials, all crafted with purpleheart. This wood has a tight grain and the natural purple color takes on much deeper, richer hues as it ages. This may be an effect of the UV rays, I have been told.
1/8” purpleheat sheets are ideal for custom inlay, trim and intarsia, and I got mine at Amazon. Other exotic woods are available as well. Most people are reminded of a bird or a mustache by the cap in the picture below. The lower right side is carved that way for a reason, it’s an inside gag.
The headstock finish sanded and ready for finishing after attaching the intarsia.
I used three coats of tung oil on the back of the neck and headstock. It is very slow curing so I allowed 48 hours between coats. Tung oil is a penetrating sealer rather than a “shell coat” like traditional sprays. It works very well for smoothly moving up and down the backside of the fretboard. (Which of course I totally kill, as a guitar God. Just in my mind. Sigh.)
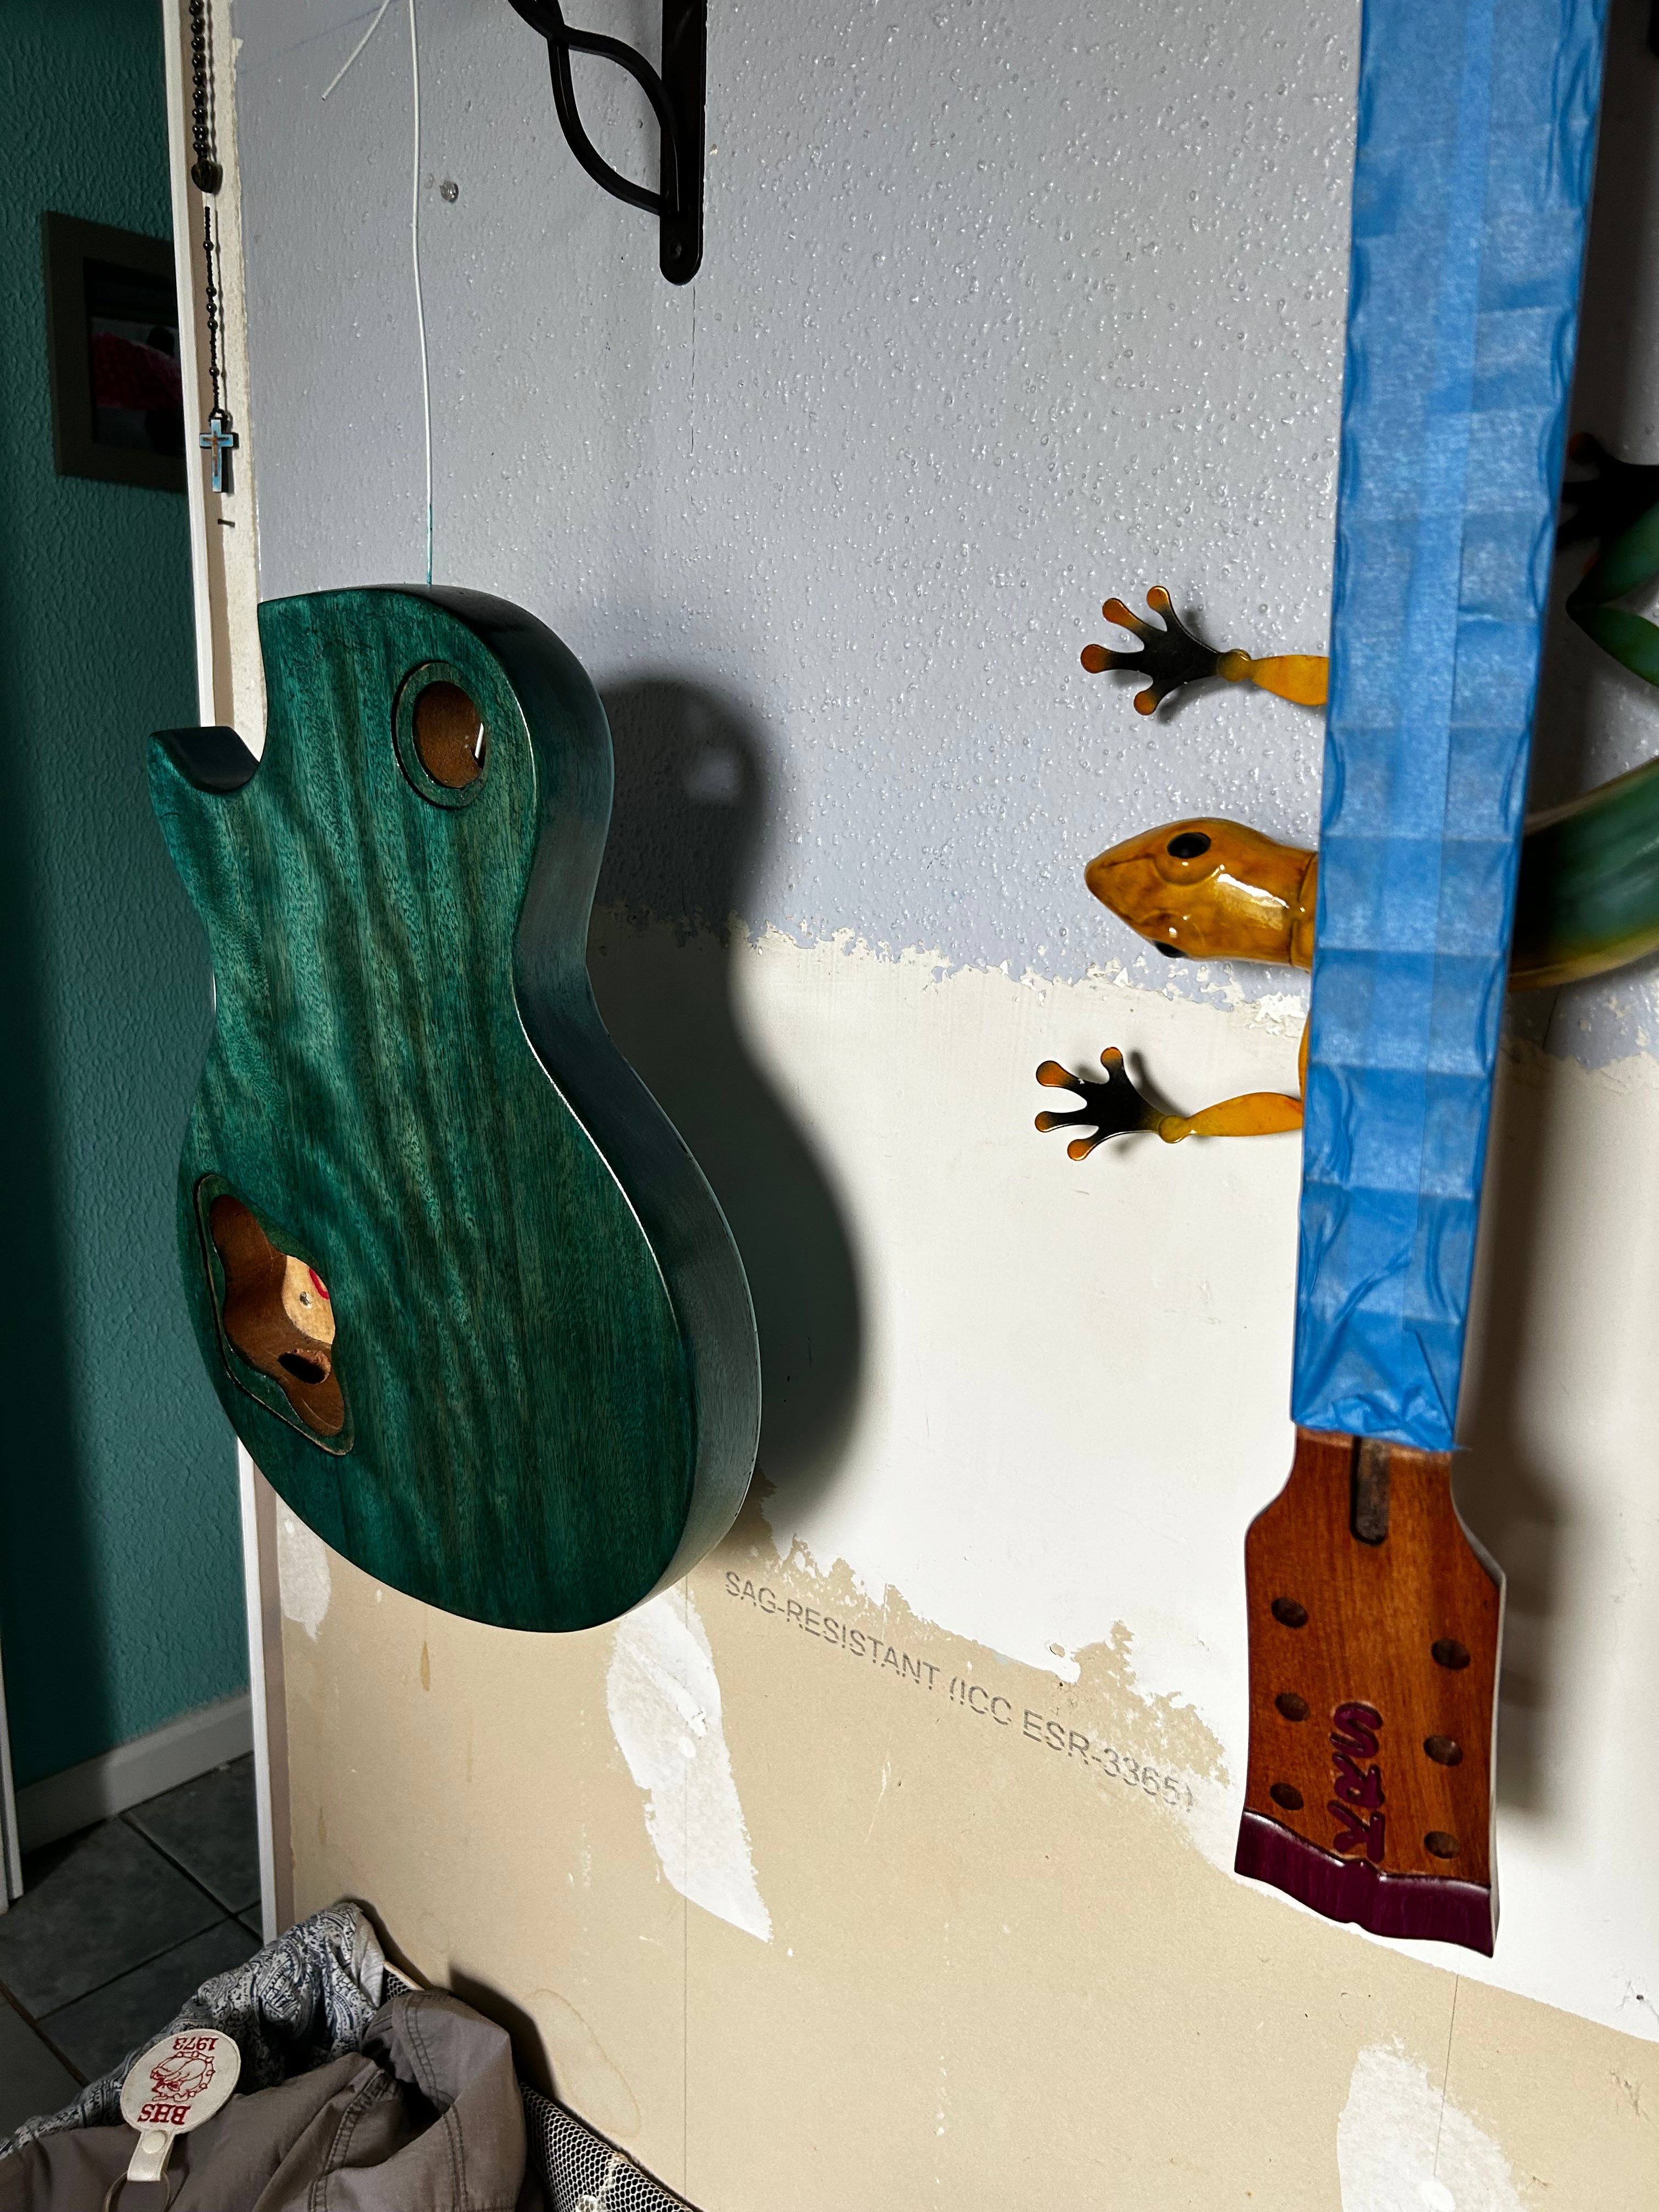
Use painter’s tape to keep the tung oil well away from the fretboard.
Preparing the Guitar Body
Sanding the neck and headstock had gone well. The body was another story. The sanding sealer mentioned earlier was very problematic. I ended up doing a lot of wet-sanding with 60 grit, just as I had foretold.
I had planned to replace the cream-colored binding, but it quickly became obvious that this would involve using my smaller hand-held router after the sanding, just going deeper and deeper into that woodworking rabbit hole — I opted to just remove the old binding and sand down the edge. Behold, we step further into custom territory.
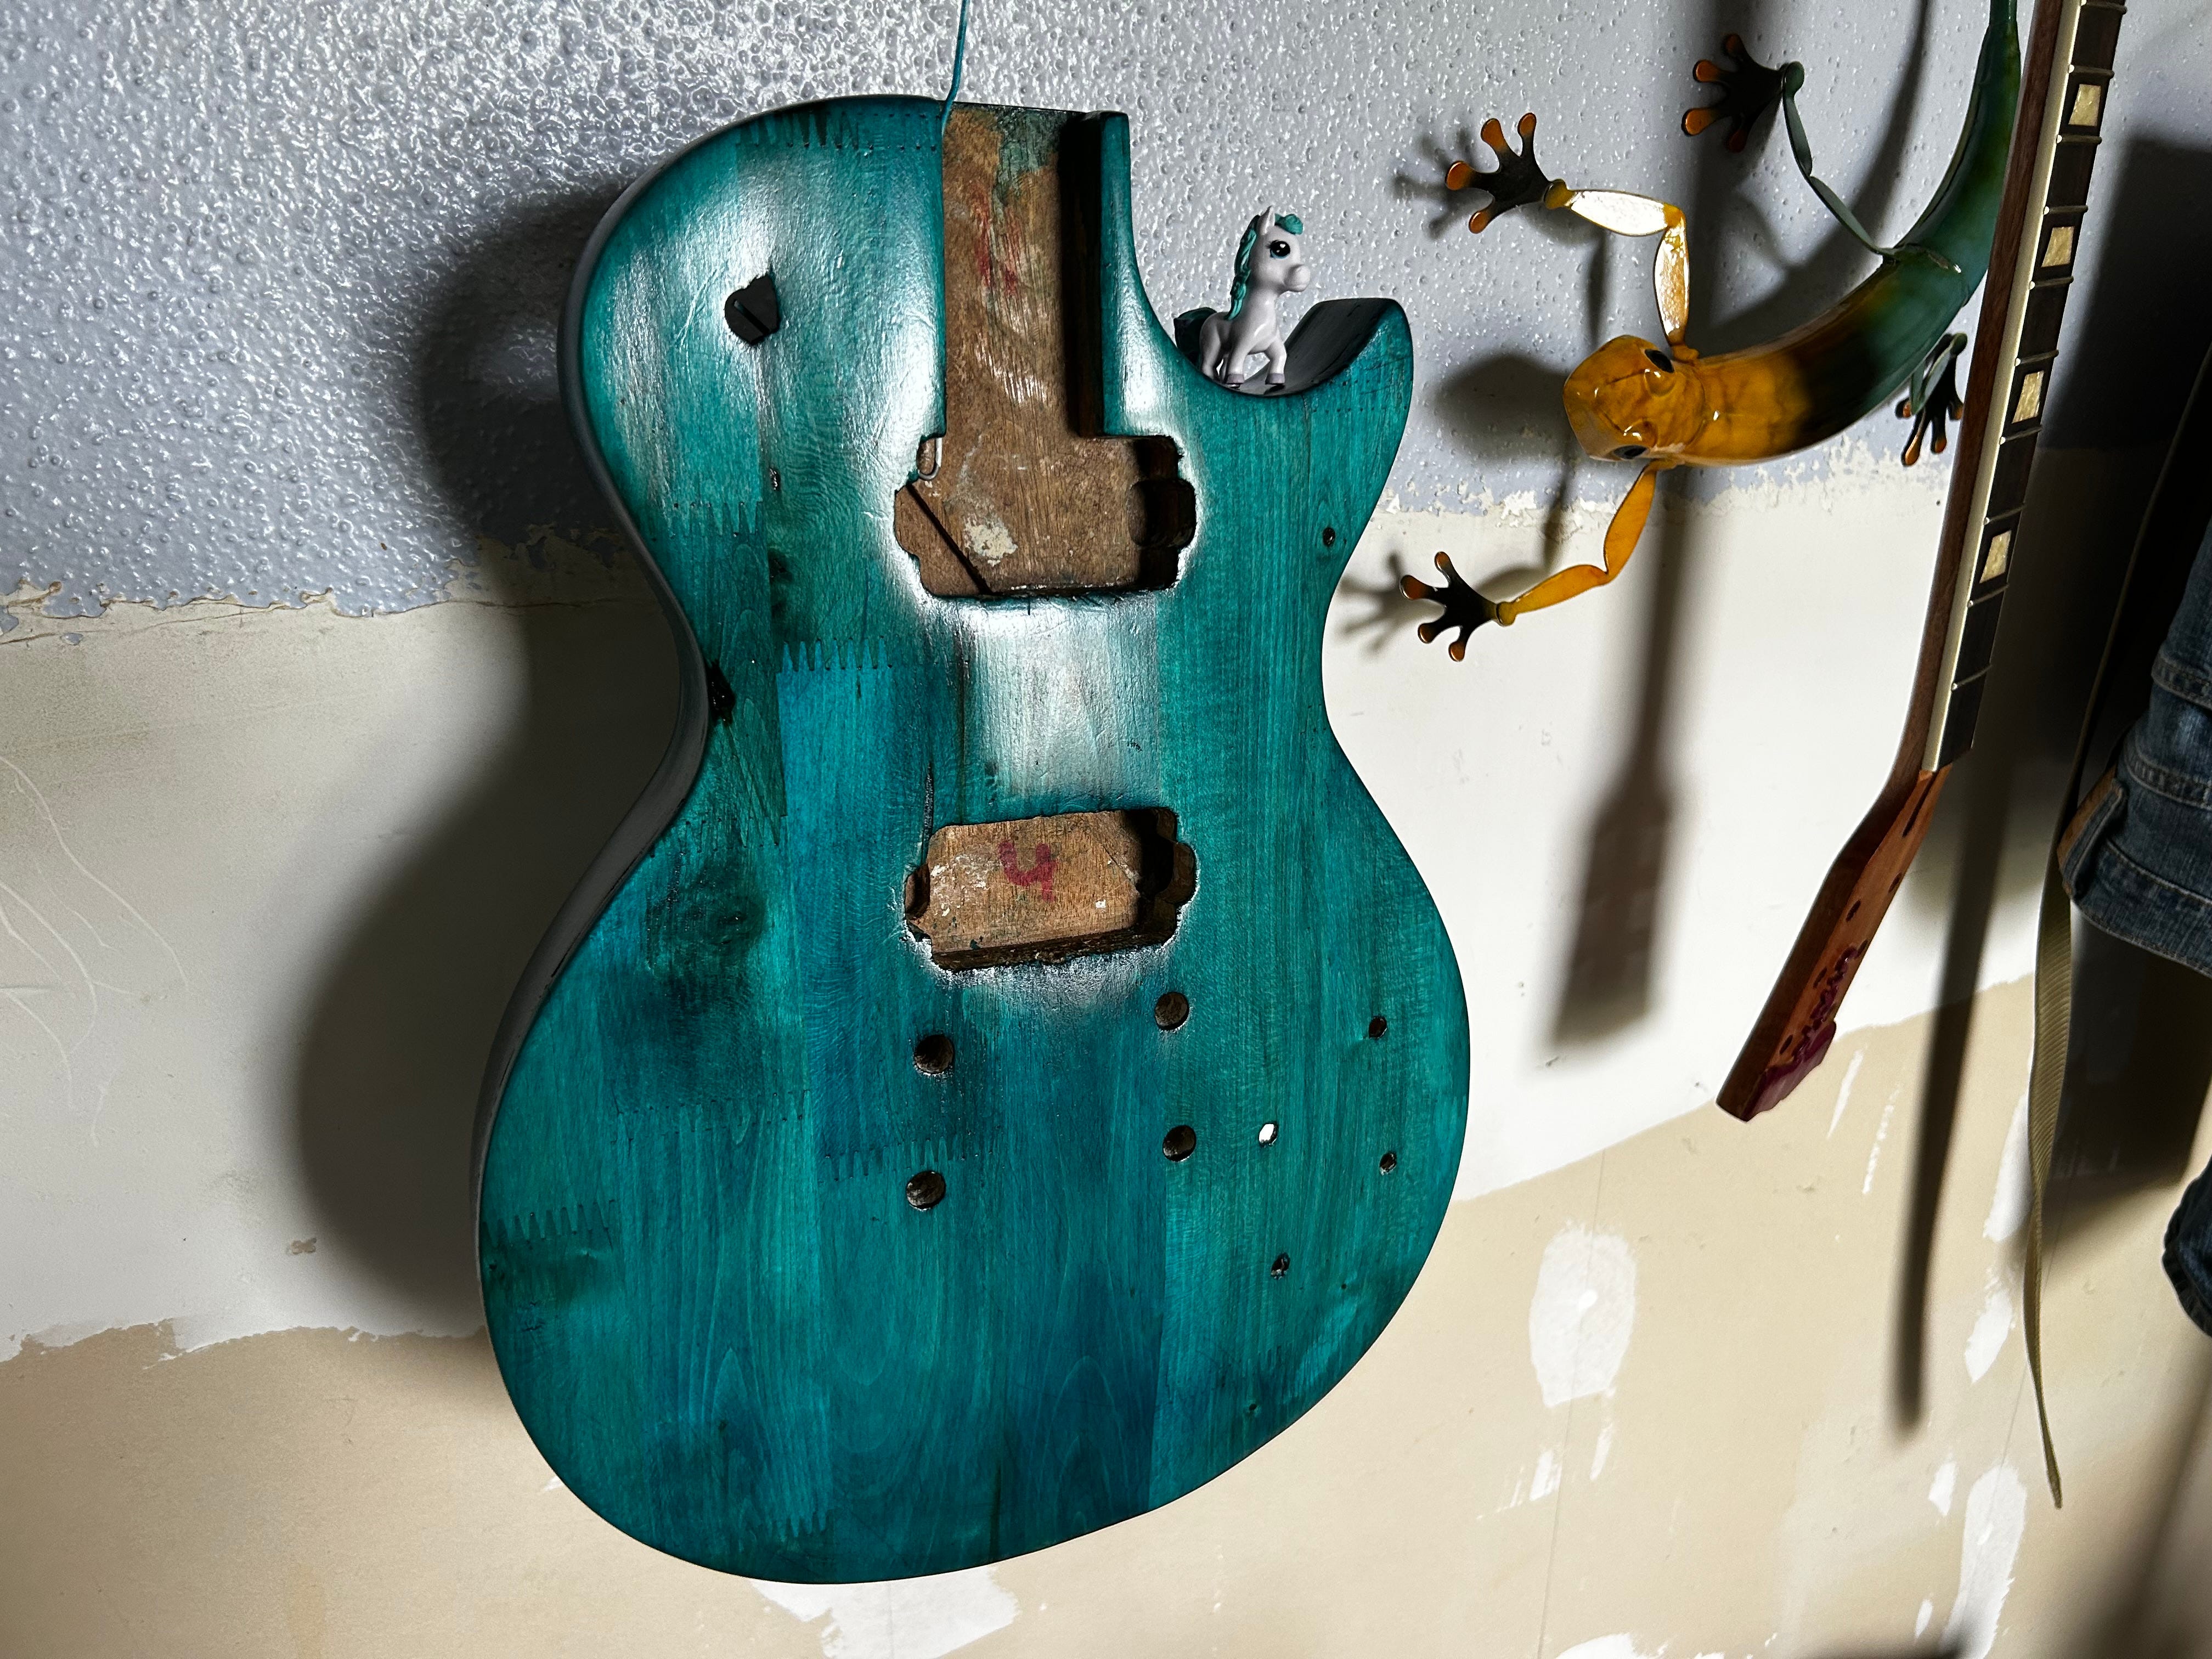
I was looking forward to bringing out that beautiful maple grain on the cap over the mahogony. It would be an outrage to cover it up with a spray finish. Cringe. Blasphemy. I decided to go with Wudtone, a proprietary penetrating oil finish made in the UK. The specific color I settled on is called Azure Lagoon. But first, I was looking forward to a lot of prep work.
There was very one important thing I kept in mind — any sanding at all is going to affect the geometry of the body. The body has already been drilled to accomodate the bridge and tailpiece and moritised for the Humbuckers. There is adjustment between all the components and their relationship to the strings, but the more the sanding diminishes the surface, the less adjustment is available.
I discovered that the sealer did reveal the grain, true enough, but a bit deeper revealed that the maple grain was just a picture, a sham. It is maple but maple scraps finger-joined. Easy come, easy go.
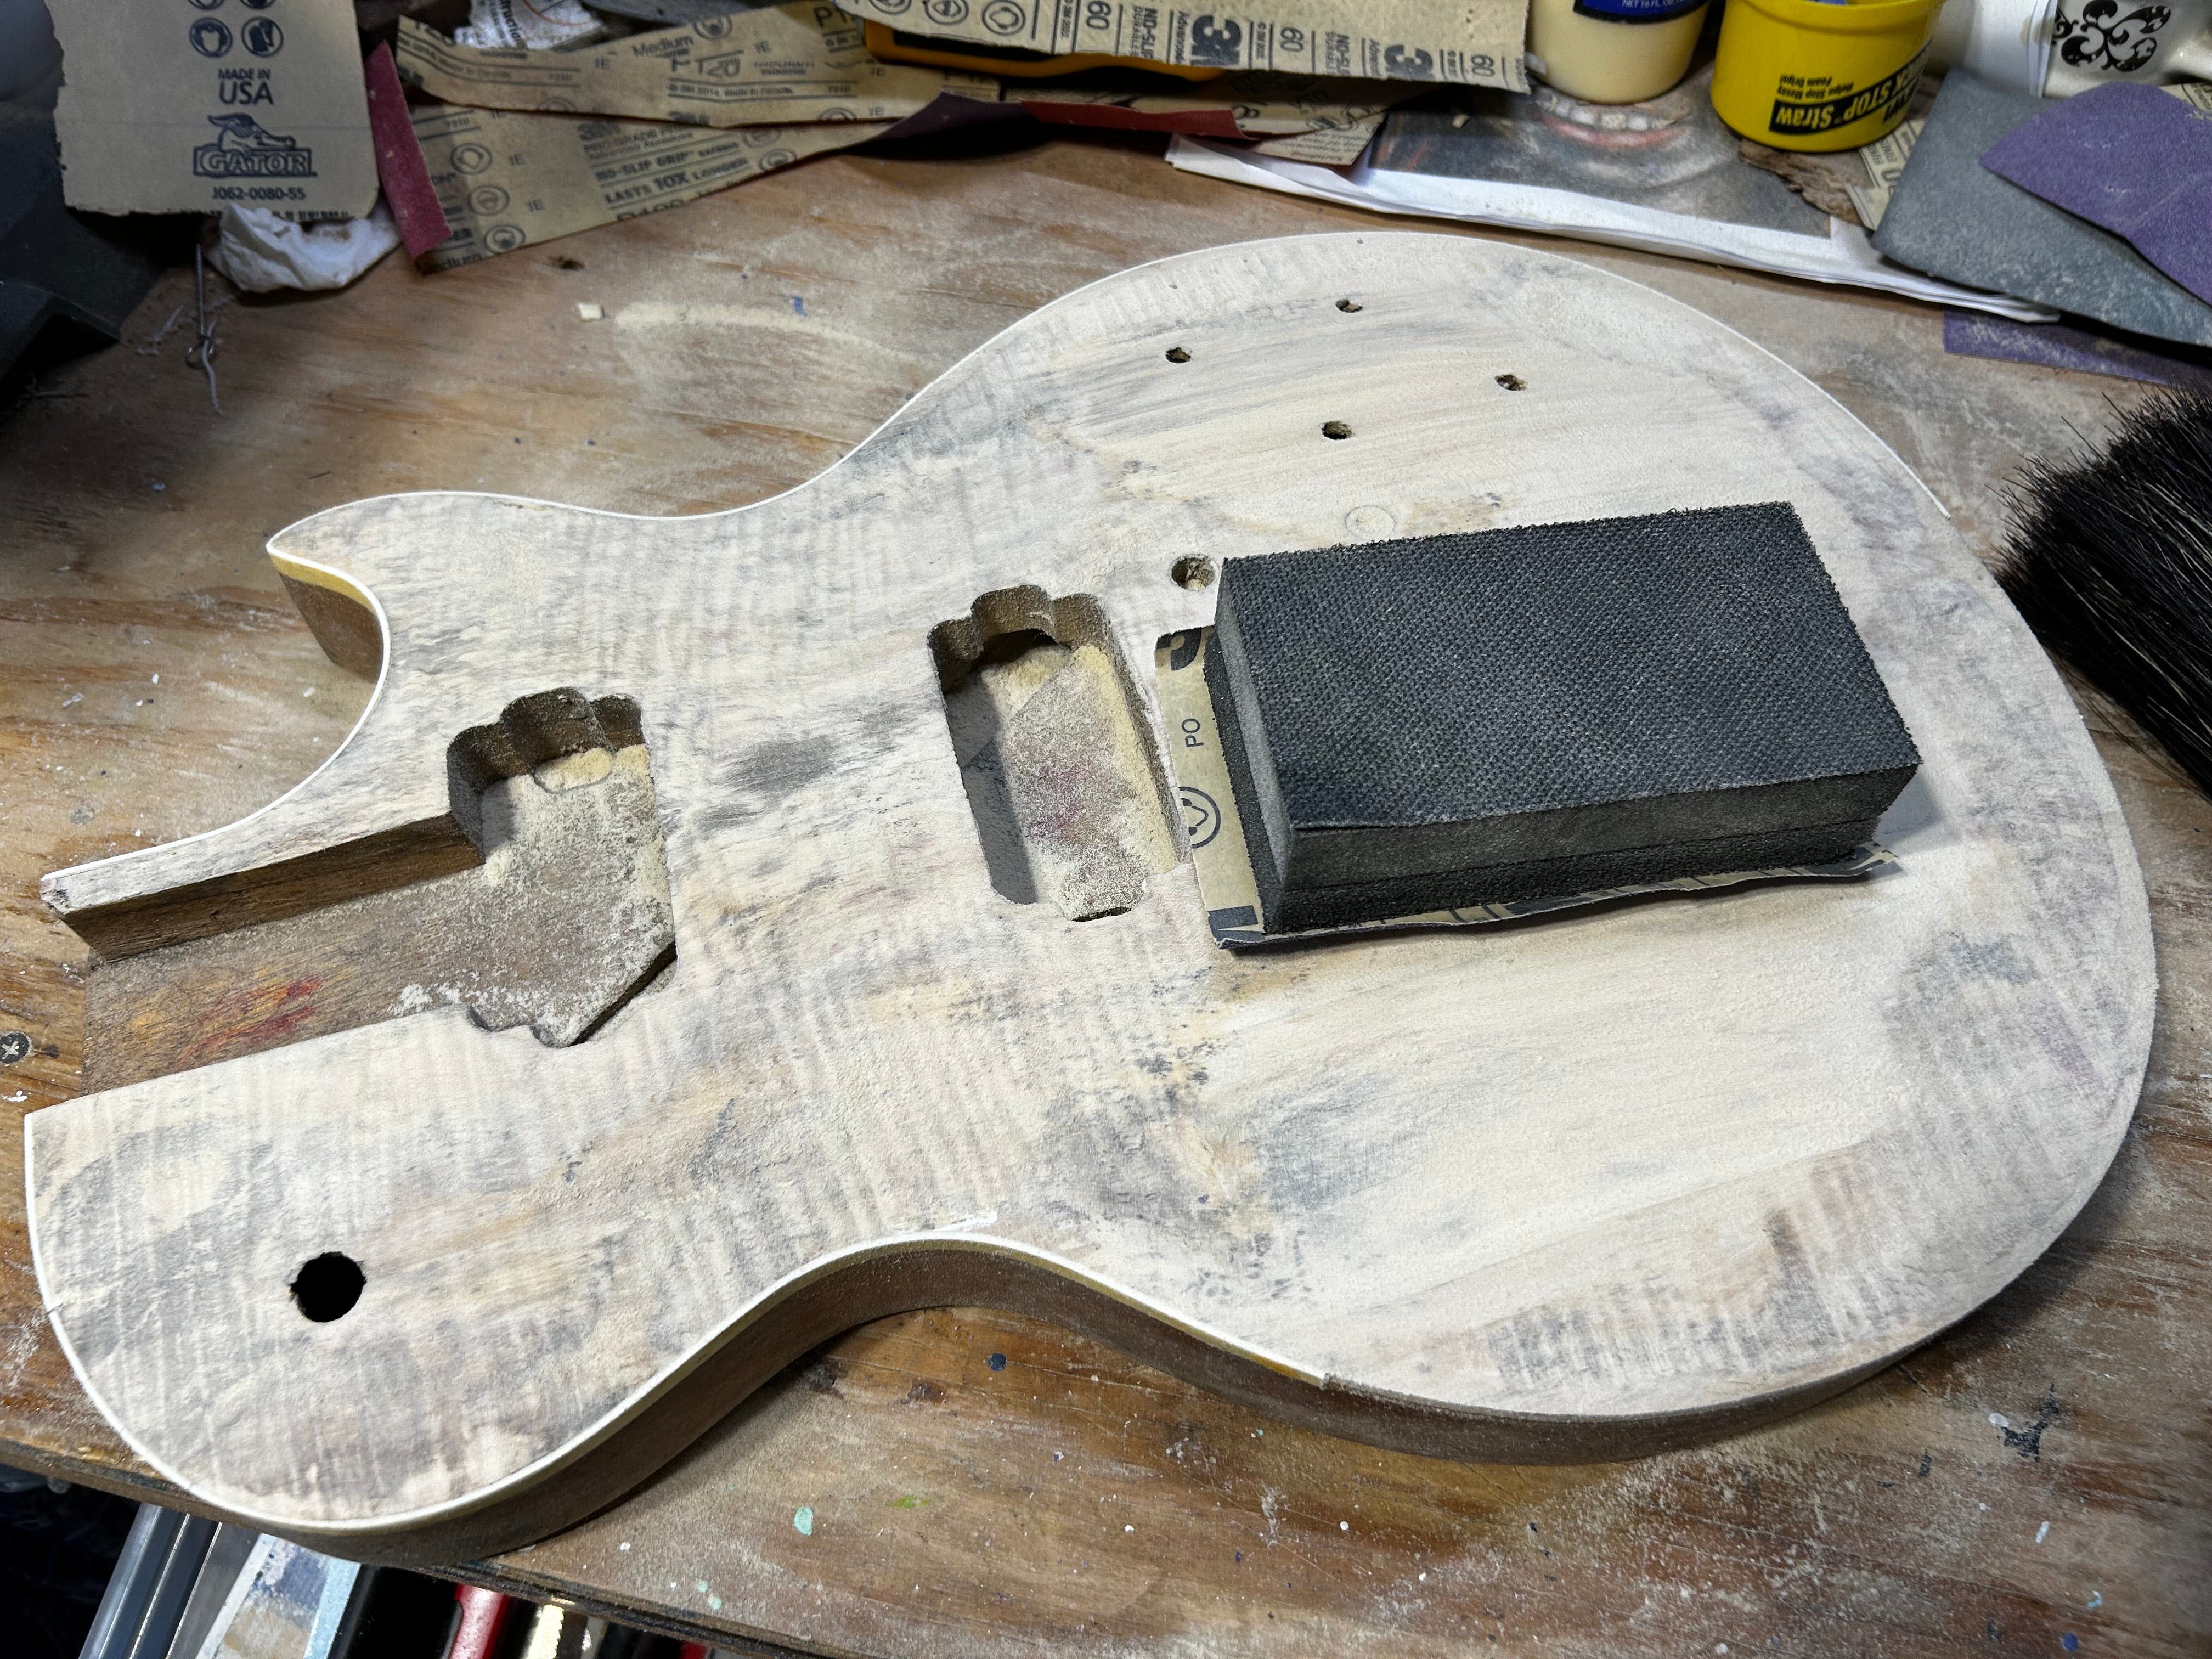
The sanding sealer is gone and the faux grain is next.
Once I removed all the faux grain and sanding sealer I began hand-sanding in diminishing grits.
Finishing the body
The Wudtone Azure Lagoon guitar finishing kit is available for delivery now at Amazon. As I mentioned, this is an oil-based penetrating finish. Different colors offered have different formulations. They are called “coats” here meaning “applications;” these are pentrating oils, pigments, and aggregates, and not to be confused with guitar spray “coats.” My has three components and I opted to include a bottle of “Silver Highlights.” To wit:
Deep color coat; 2 coats
Base coat; 5 coats
Silver highlights; 1 coat
Top coat; 5 coats
The coats go on in order as listed above. This is not a weekend project. You have to allow 48 hours between coats.
Hanging around between coats…
The big question — how much sanding to do between coats? The answer is none! Instead, just a light polishing with a Scotch-Bright pad. There was a time when I would have used fine steel wool but these pads don’t leave micro metal fibers trapped in the wood surface that oxidize over time.
Assembling the guitar
Everything up to this point had been basic carpentry; now we venture cautiously yet boldly into luthier territory, which is not my balliwick. And this is where my first truly big mistake became evident. And this, patient reader, is why I warned you at the beginning that lessons learned on a no-do-over, expensive project are so important.
Note that this is a glue-up kit, not one with a bolt-on neck. I had dry-fit the neck into the body and made all the corrections needed before finishing. Obviously this involved not only cosmetics and a tight fit, but also the two alignments in the horizontal and vertical direction.
What I learned in the time before assembly was that it is absolutely critical that the distance between the nut and the 12th fret and the distance between the 12th fret and the bridge is precisely the same. If not, you’ve just got a very pretty prop because it will never play right.
Luckily, I had to remove 5/16” from the neck and do some work on the shoulder. If it had have been short I could have shimmed it but then what to do with the shoulder gap…
Anyway, I did a very careful glue-up with clever clamping. I used Titebond III because it has a long working window if I needed to make adjustments. I’ve used traditional hide glue before doing instrument repairs but the bond just isn’t there for a guitar neck, in my humble opinion.
Installing the electronics
Before beginning messing with the individual components I liberally painted all cavities with StewMac Conductive shielding paint. This is messy stuff and stinks so gear up — mask, gloves, sense of humor, etc.
The rest was just straight-forward; run the Les Paul wiring harness, secure the components, and solder the connections. There were two ways to make the connections on the pots and I went for the more traditional 50s-style configuration.
I had read horror stories about installing StewMac Parson Street Humbucker pickups because the springs go flying! I’m already super clumsy. Much to my surprise, they went in smooth as molasses.
Finishing up
Starting at the end and working up, I laid out the Gotoh 510 bridge and tailpiece .The tailpiece goes in first; it’s a nice friction fit. Next goes the bridge. It’s also a friction fit but has adjustments which are left for later.
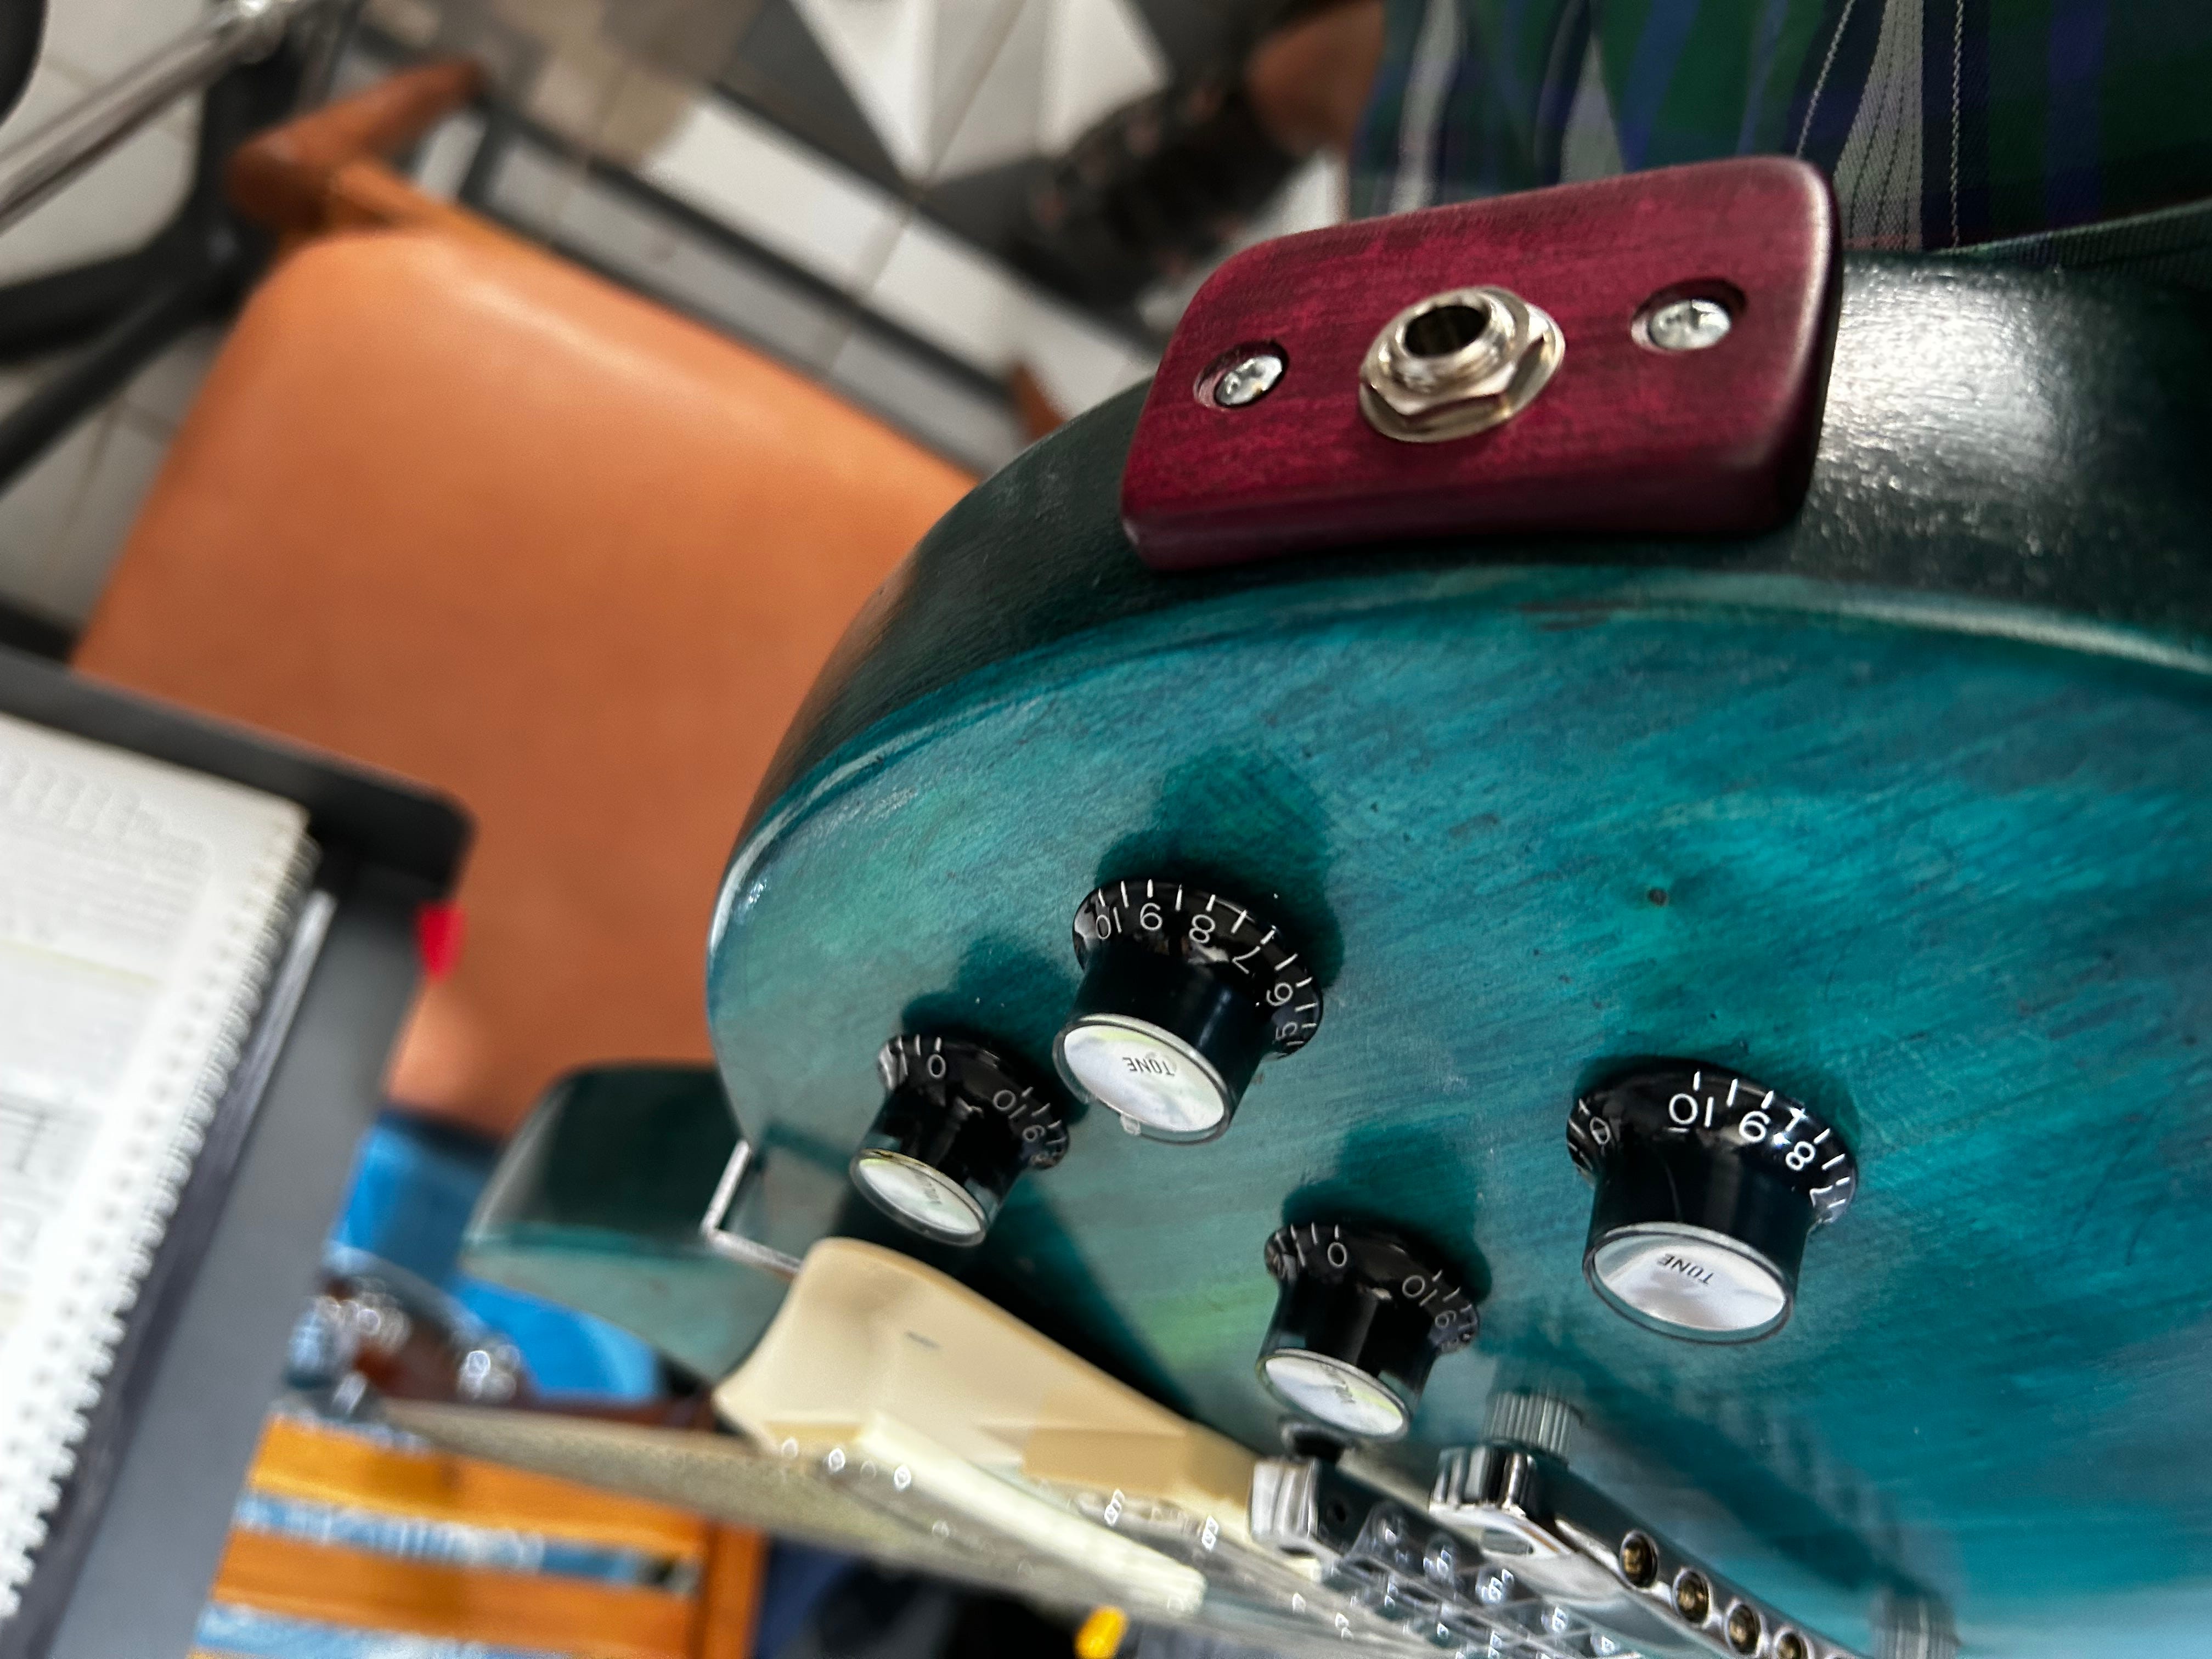
I crafted this cable trim cover out of purpleheart to match the headstock. Tip: to get the perfect arc, I held a strip of sandpaper on the body and sanded the cover until the match was achieved.
Pickup covers, pickguard, toggle switch cover, knobs, plastic cover plates, and cable jack trim installation follow. The Graph Tech Black TUSQ XL nut is just lightly glued in place with a couple drops of white Elmer’s Glue; tweaking may be required.
I had waited until now to install my Grover Locking Rotomatics because the tung oil is so long curing that every additional moment before tightening them down is helpful. Tip: always plan a task anticipating the simplification of the eventual repair that you will be required to make.
Finally it’s time to string it up and begin tweaking. It is a long tweaking dance involving adjusting both sides of the bridge, raising and lowering both pickups on both sides, a bit of detail work adjusting the nut, and then making tiny individual string height adjustments on the bridge to eliminate buzz.
Done.
I hope my trial and error guitar build made your project easier, inspired you, or just entertained you. Please subscribe and share, and help other builders by dropping your own tips in the comments. See ya!

Further Content
Practice Mindfulness (podcast)
Rockler Sign Making Template Review (product review)
How to Sharpen Knives to a Razor’s Edge (product review)
Laws That are Not Obeyed are Ineffective (podcast)
Tips to Cure Plantar Fasciitis (article)