

Rockler Sign Making Template Kit Review
Make professional signs with woodworking templates and a plunge router

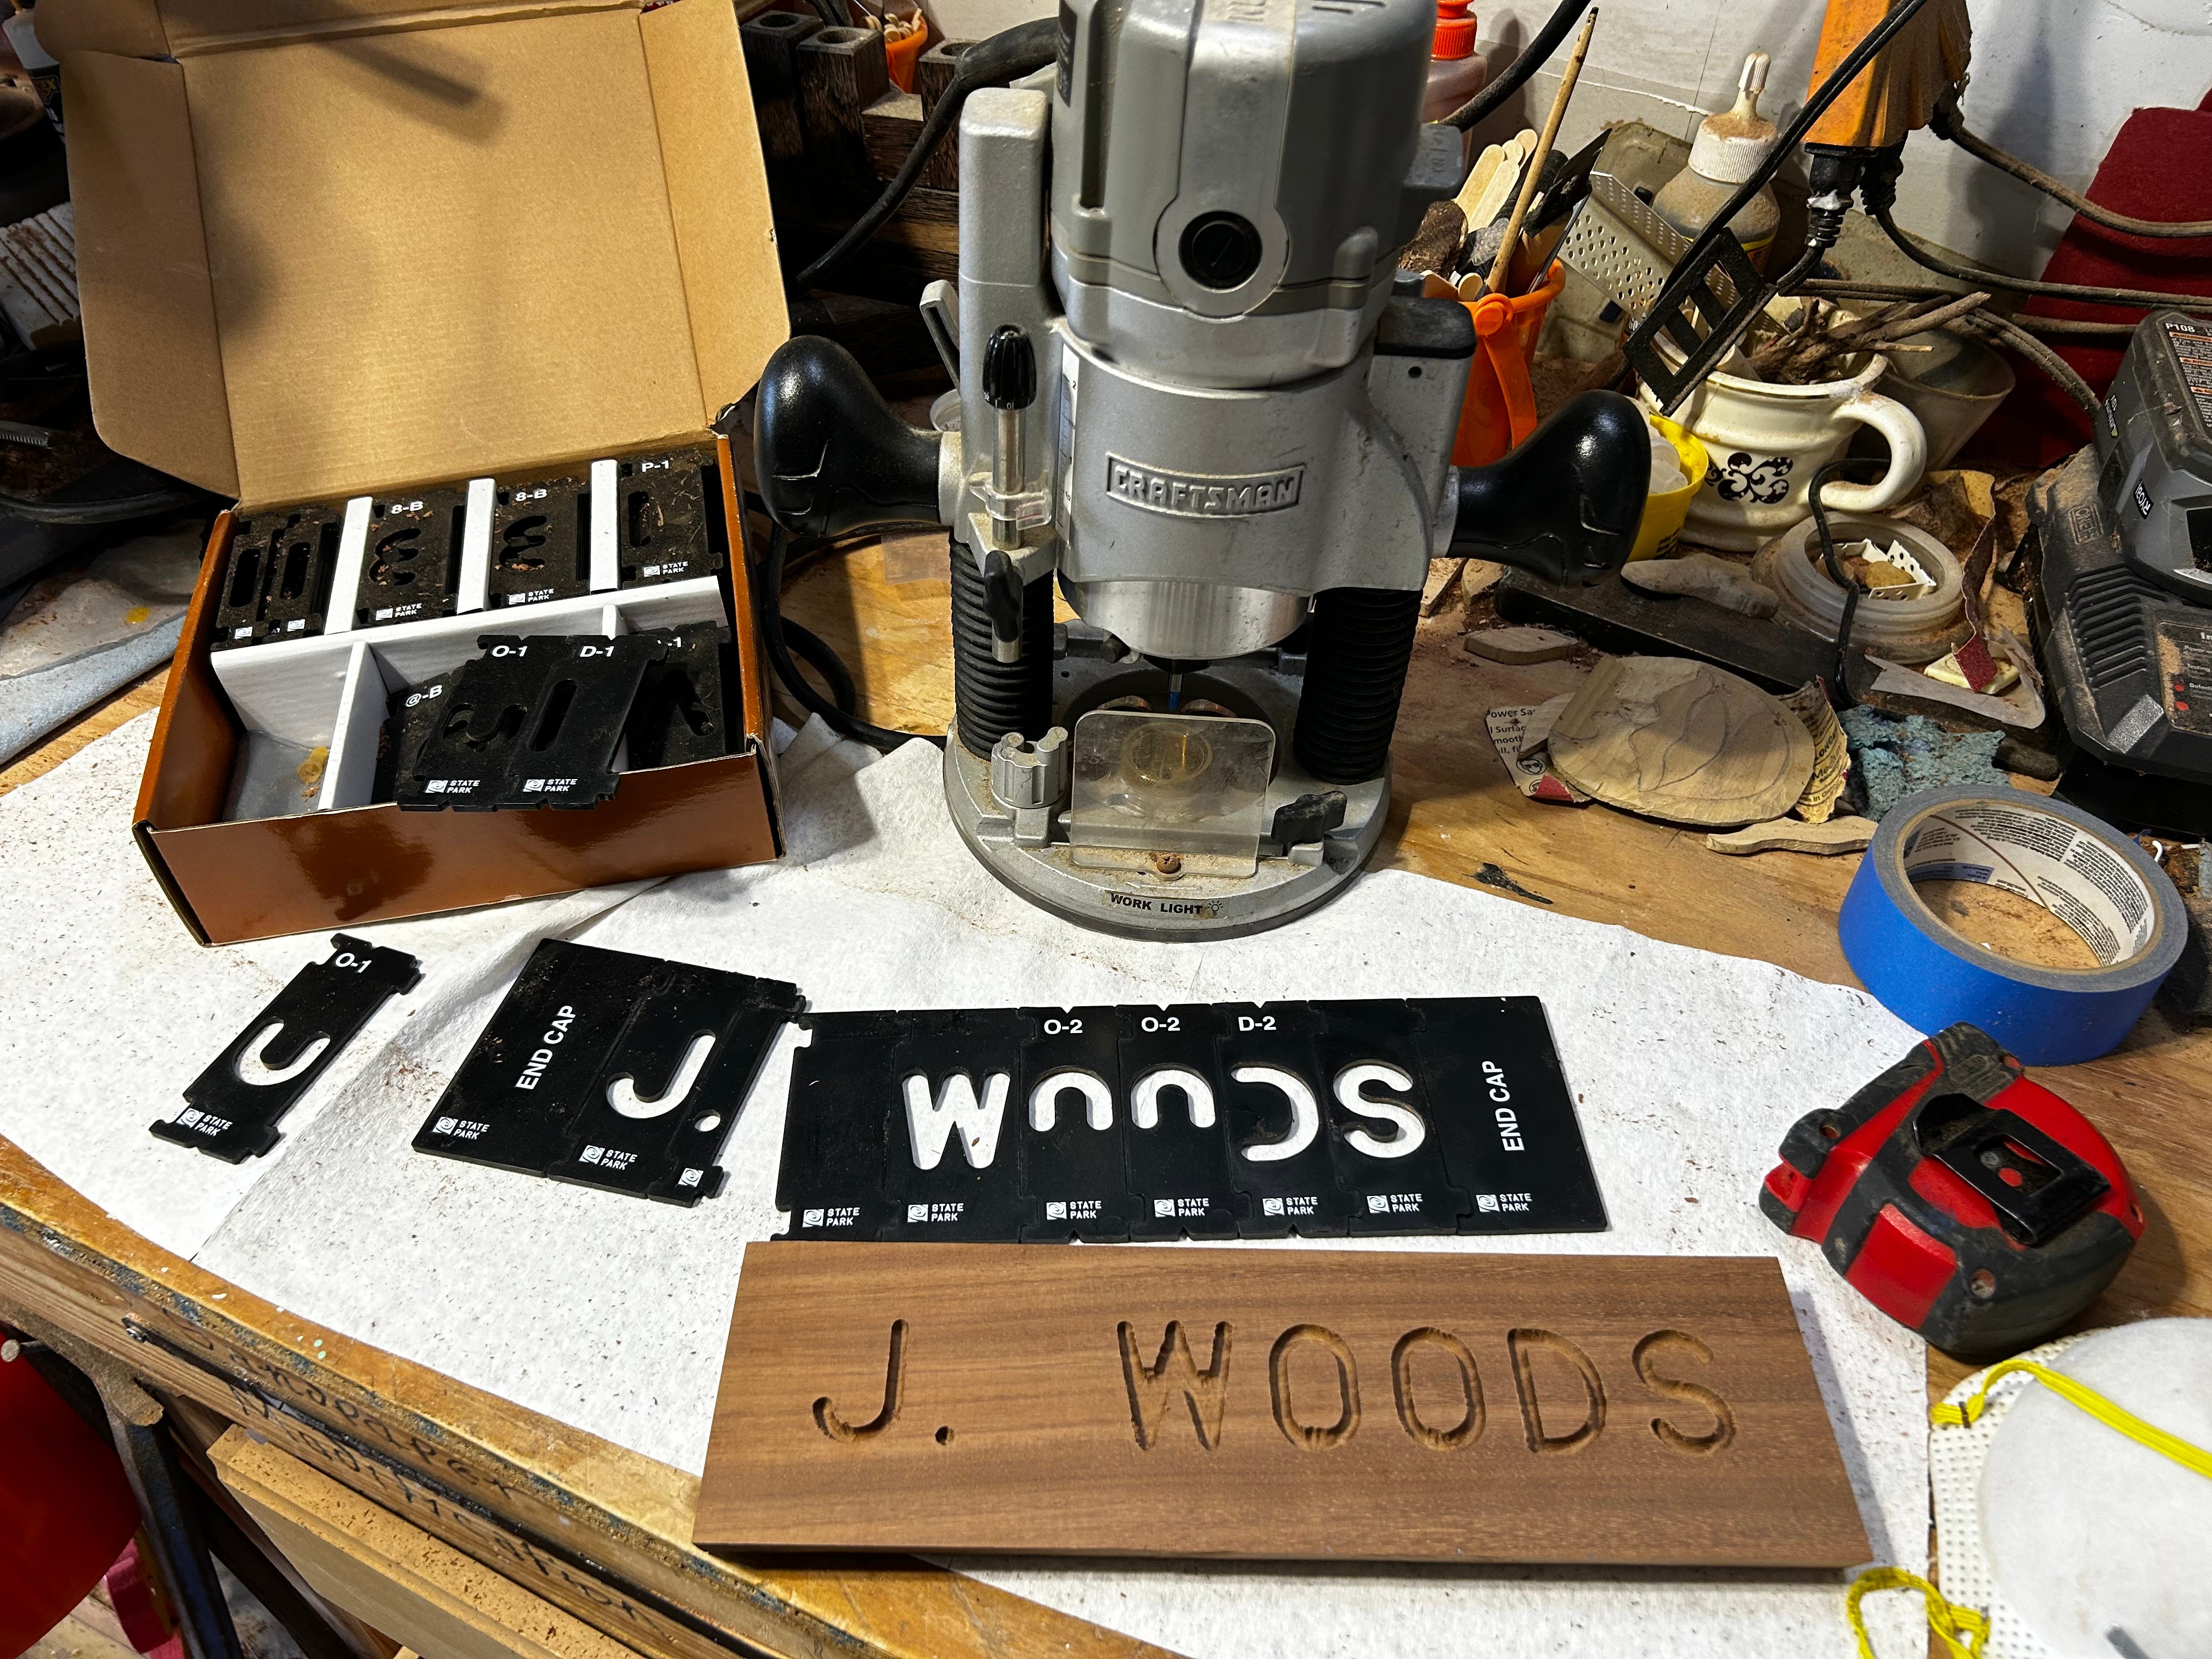
My desk name place project shows how the letters snap together and the 2-part template needed to complete some letters. Here, the letter ‘O’ uses top O-2 (mounted) and O-1 (off to the left). The letter ‘D’ is also 2-part.
Tools referenced in this review are available on Amazon and may provide revenue to support this content. Thanks for your continued support!
Welcome to The Insomniac Workshop. Recently a friend of mine was graduating from college and I wanted to make him something appropriate to the occasion, was sturdy enough to last a career, and was classy enough to make a statement. A DIY desk name plate sprung to mind. After all, first impressions when his desk is approached by a supplicant and all that.
I needed a template kit, though, and since I already own a bowtie inlay kit from Rockler and like the quality and accuracy, I found this Rockler Sign Making Template Kit and decided to give it a go. For this project I opted for the 1.5” font. There are a total of 99 pieces in this sign-making kit.
I used mahogany for the face and poplar for the base. I beveled the base of the face and the corresponding part of the base at 45 degrees. I used Titebond III glue. Although it made a sturdy joint, I beefed it up with a single 1/4” dowel right in the center, not only with added long-term solidity, but as an assist in the glue-up since clamping was pretty much out of the question.
What’s in the Box?
The box this sign making kit comes in is jam-packed with the various components that snap together: all the letters and numbers (with a generous number of duplicates), 9 special characters, kerning spacers (to make different size characters space normally), and a 5/8” inch brass guide bushing.
What’s not in the box? You will need a 3/16” signmaker’s carbide router bit, available from Amazon. This size pairs up with the bushing, which mounts to your router base. It you’ve done much woodworking inlay work, you may already have this bit in your shop.
You will also need a plunge router. Trying to use a fixed, non-plunging router with inlay templates is very dangerous and will certainly introduce flaws. And make you talk dirty (I jest!). Note: always practice mindfulness in the shop. Repeat after me, “I will leave the shop with the same number of apendages and eyes as I entered with.” You’ll thank me later.
How the Kit Works
The pieces all snap together tightly and you simply tape the template down and plunge away. For letters that require 2 pieces and 2 passes with the router, they are labeled to avoid mistakes. See pieces O-1 and O-2 in the picture at the top of this article as an example The letter ‘D’ is also 2 pieces.
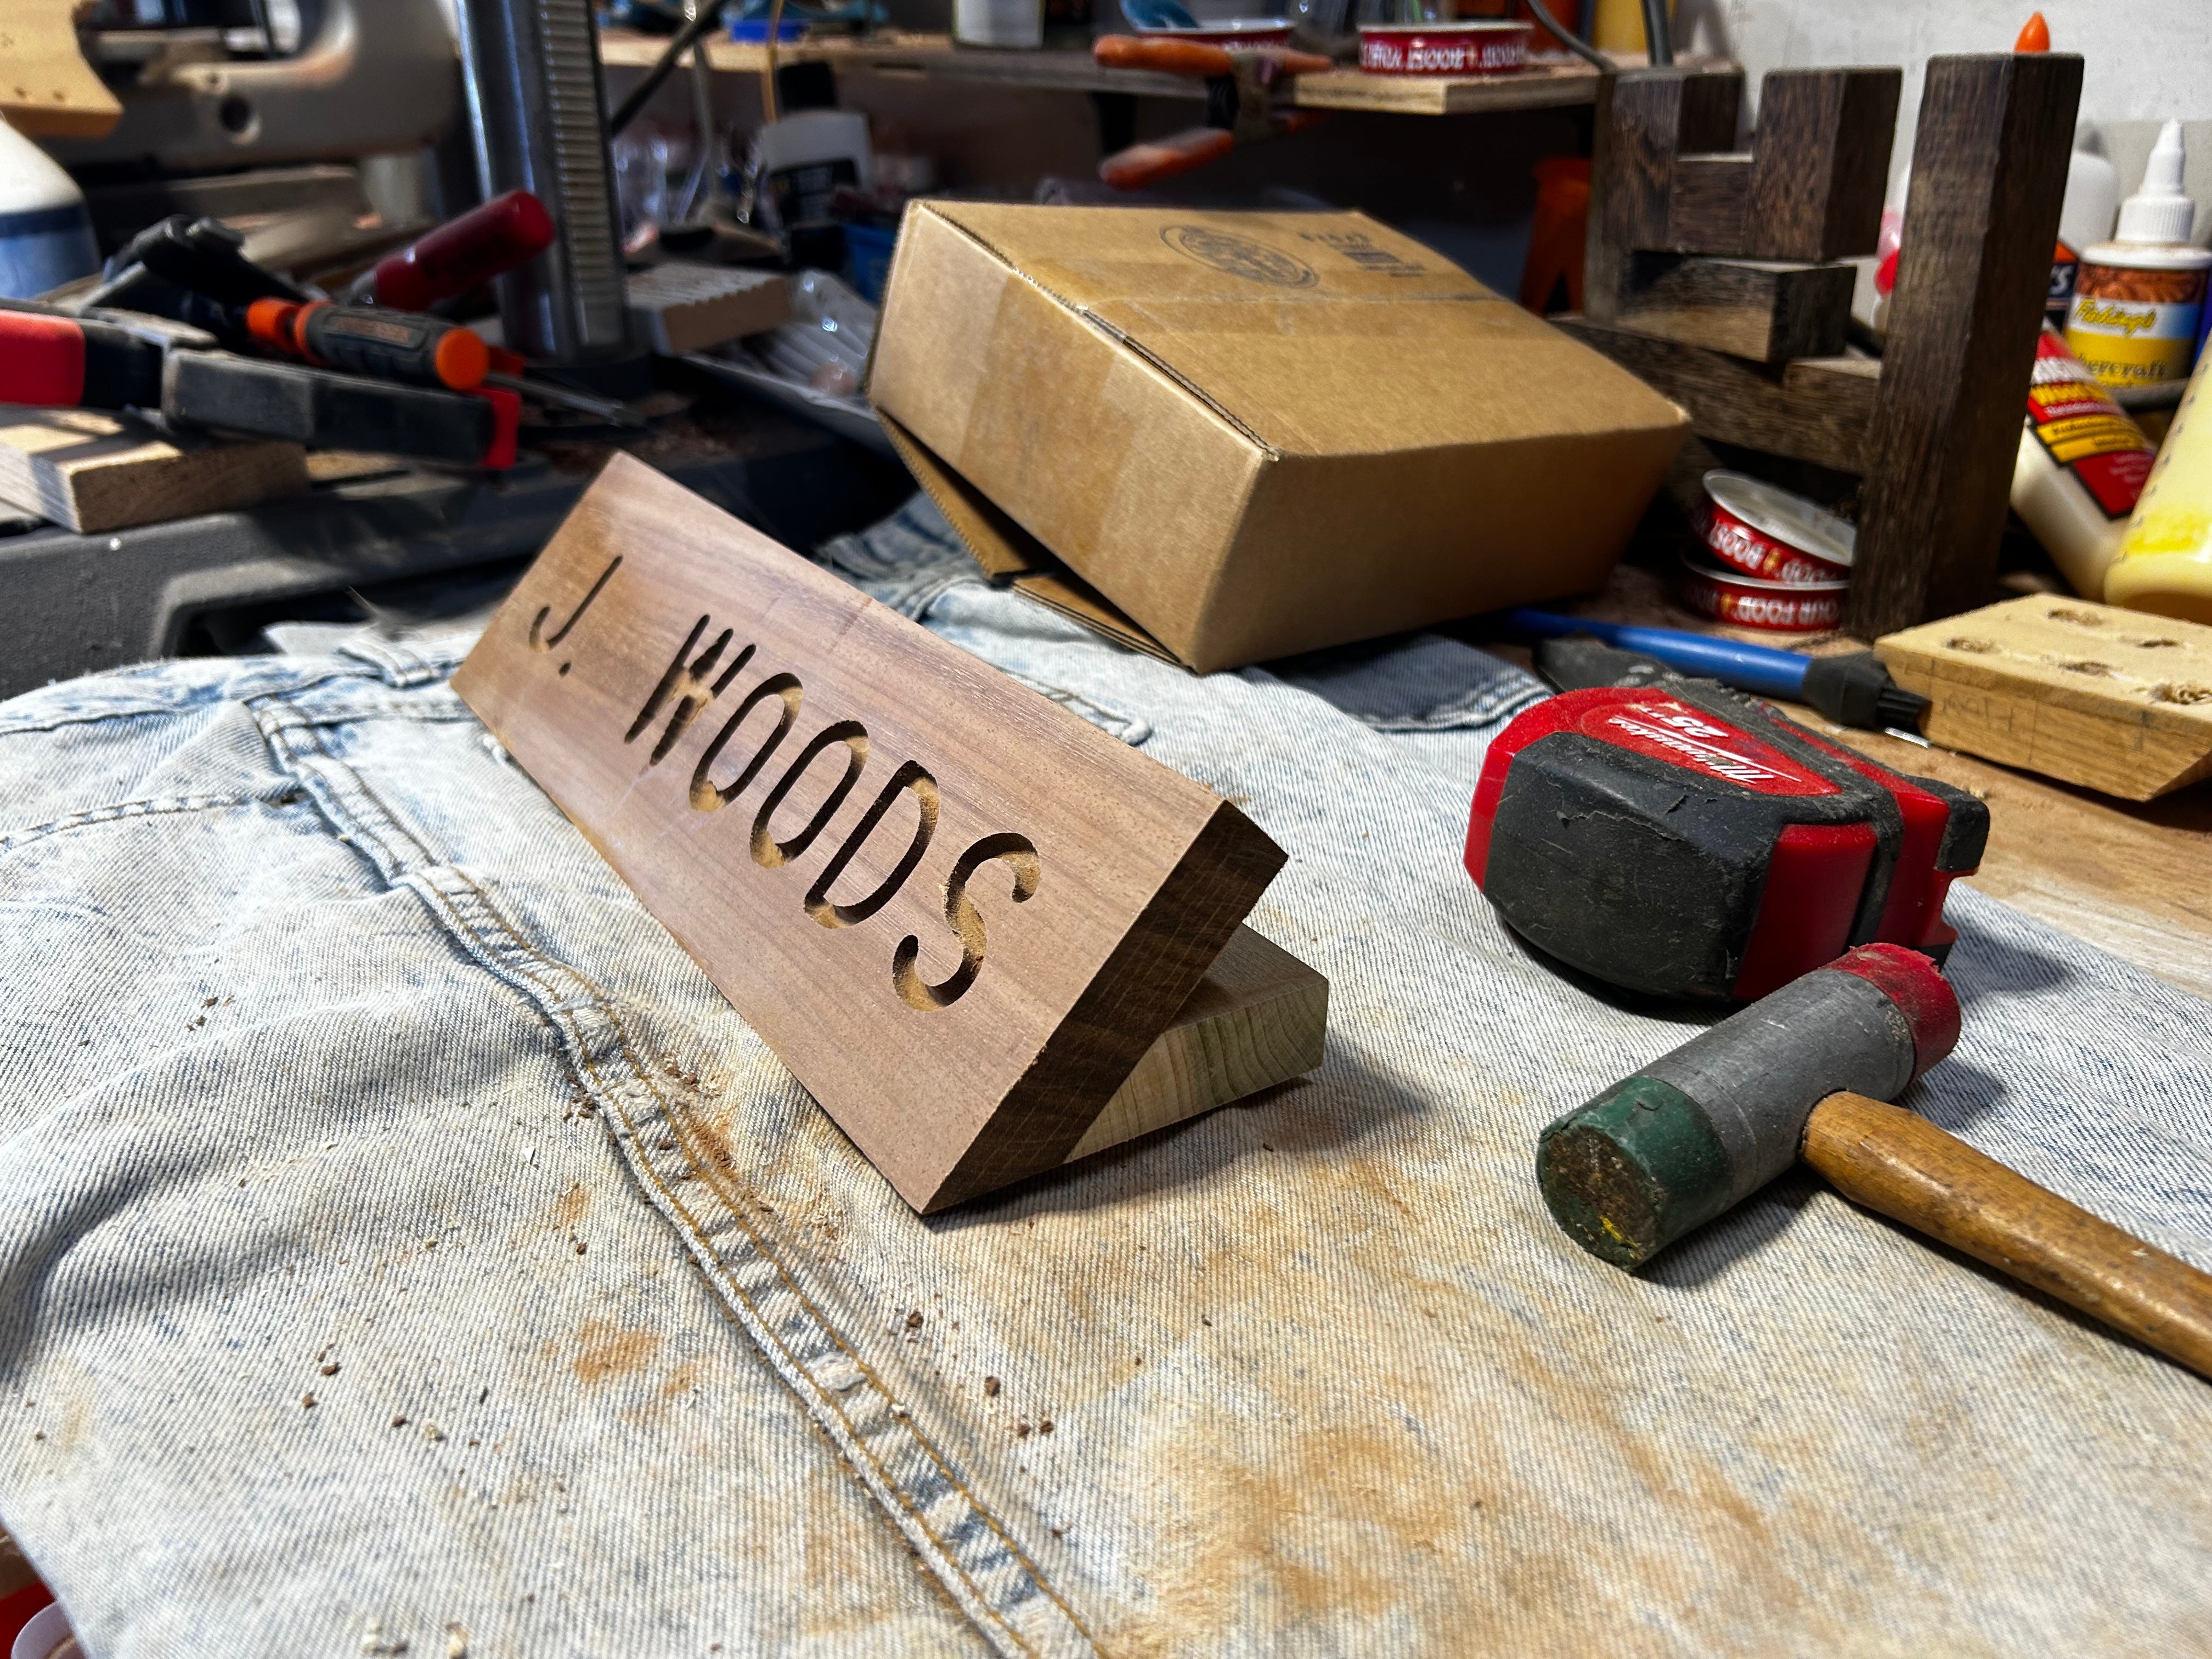
The face has been routed and the base attached. Time for final sanding and finishing.
The kit includes kerning spacers to make the letters align proportionally, as typesetters do. Lower quality sign template kits might not provide this and the results are not pleasing to the eye.
How do you put it all together? To avoid having to waste time and material on trial and error, Rockler provides an online type-setting service free for customers. I just printed the files and assembled the template. I used painter’s tape to hold it down. I set the initial plunge depth of the carbide router bit at 3/16” below the router baseplate, which is what you see in the picture above.
For the second pass, I simply changed out those letters that were 2-part and made another pass, only having to hit the changed-out parts.
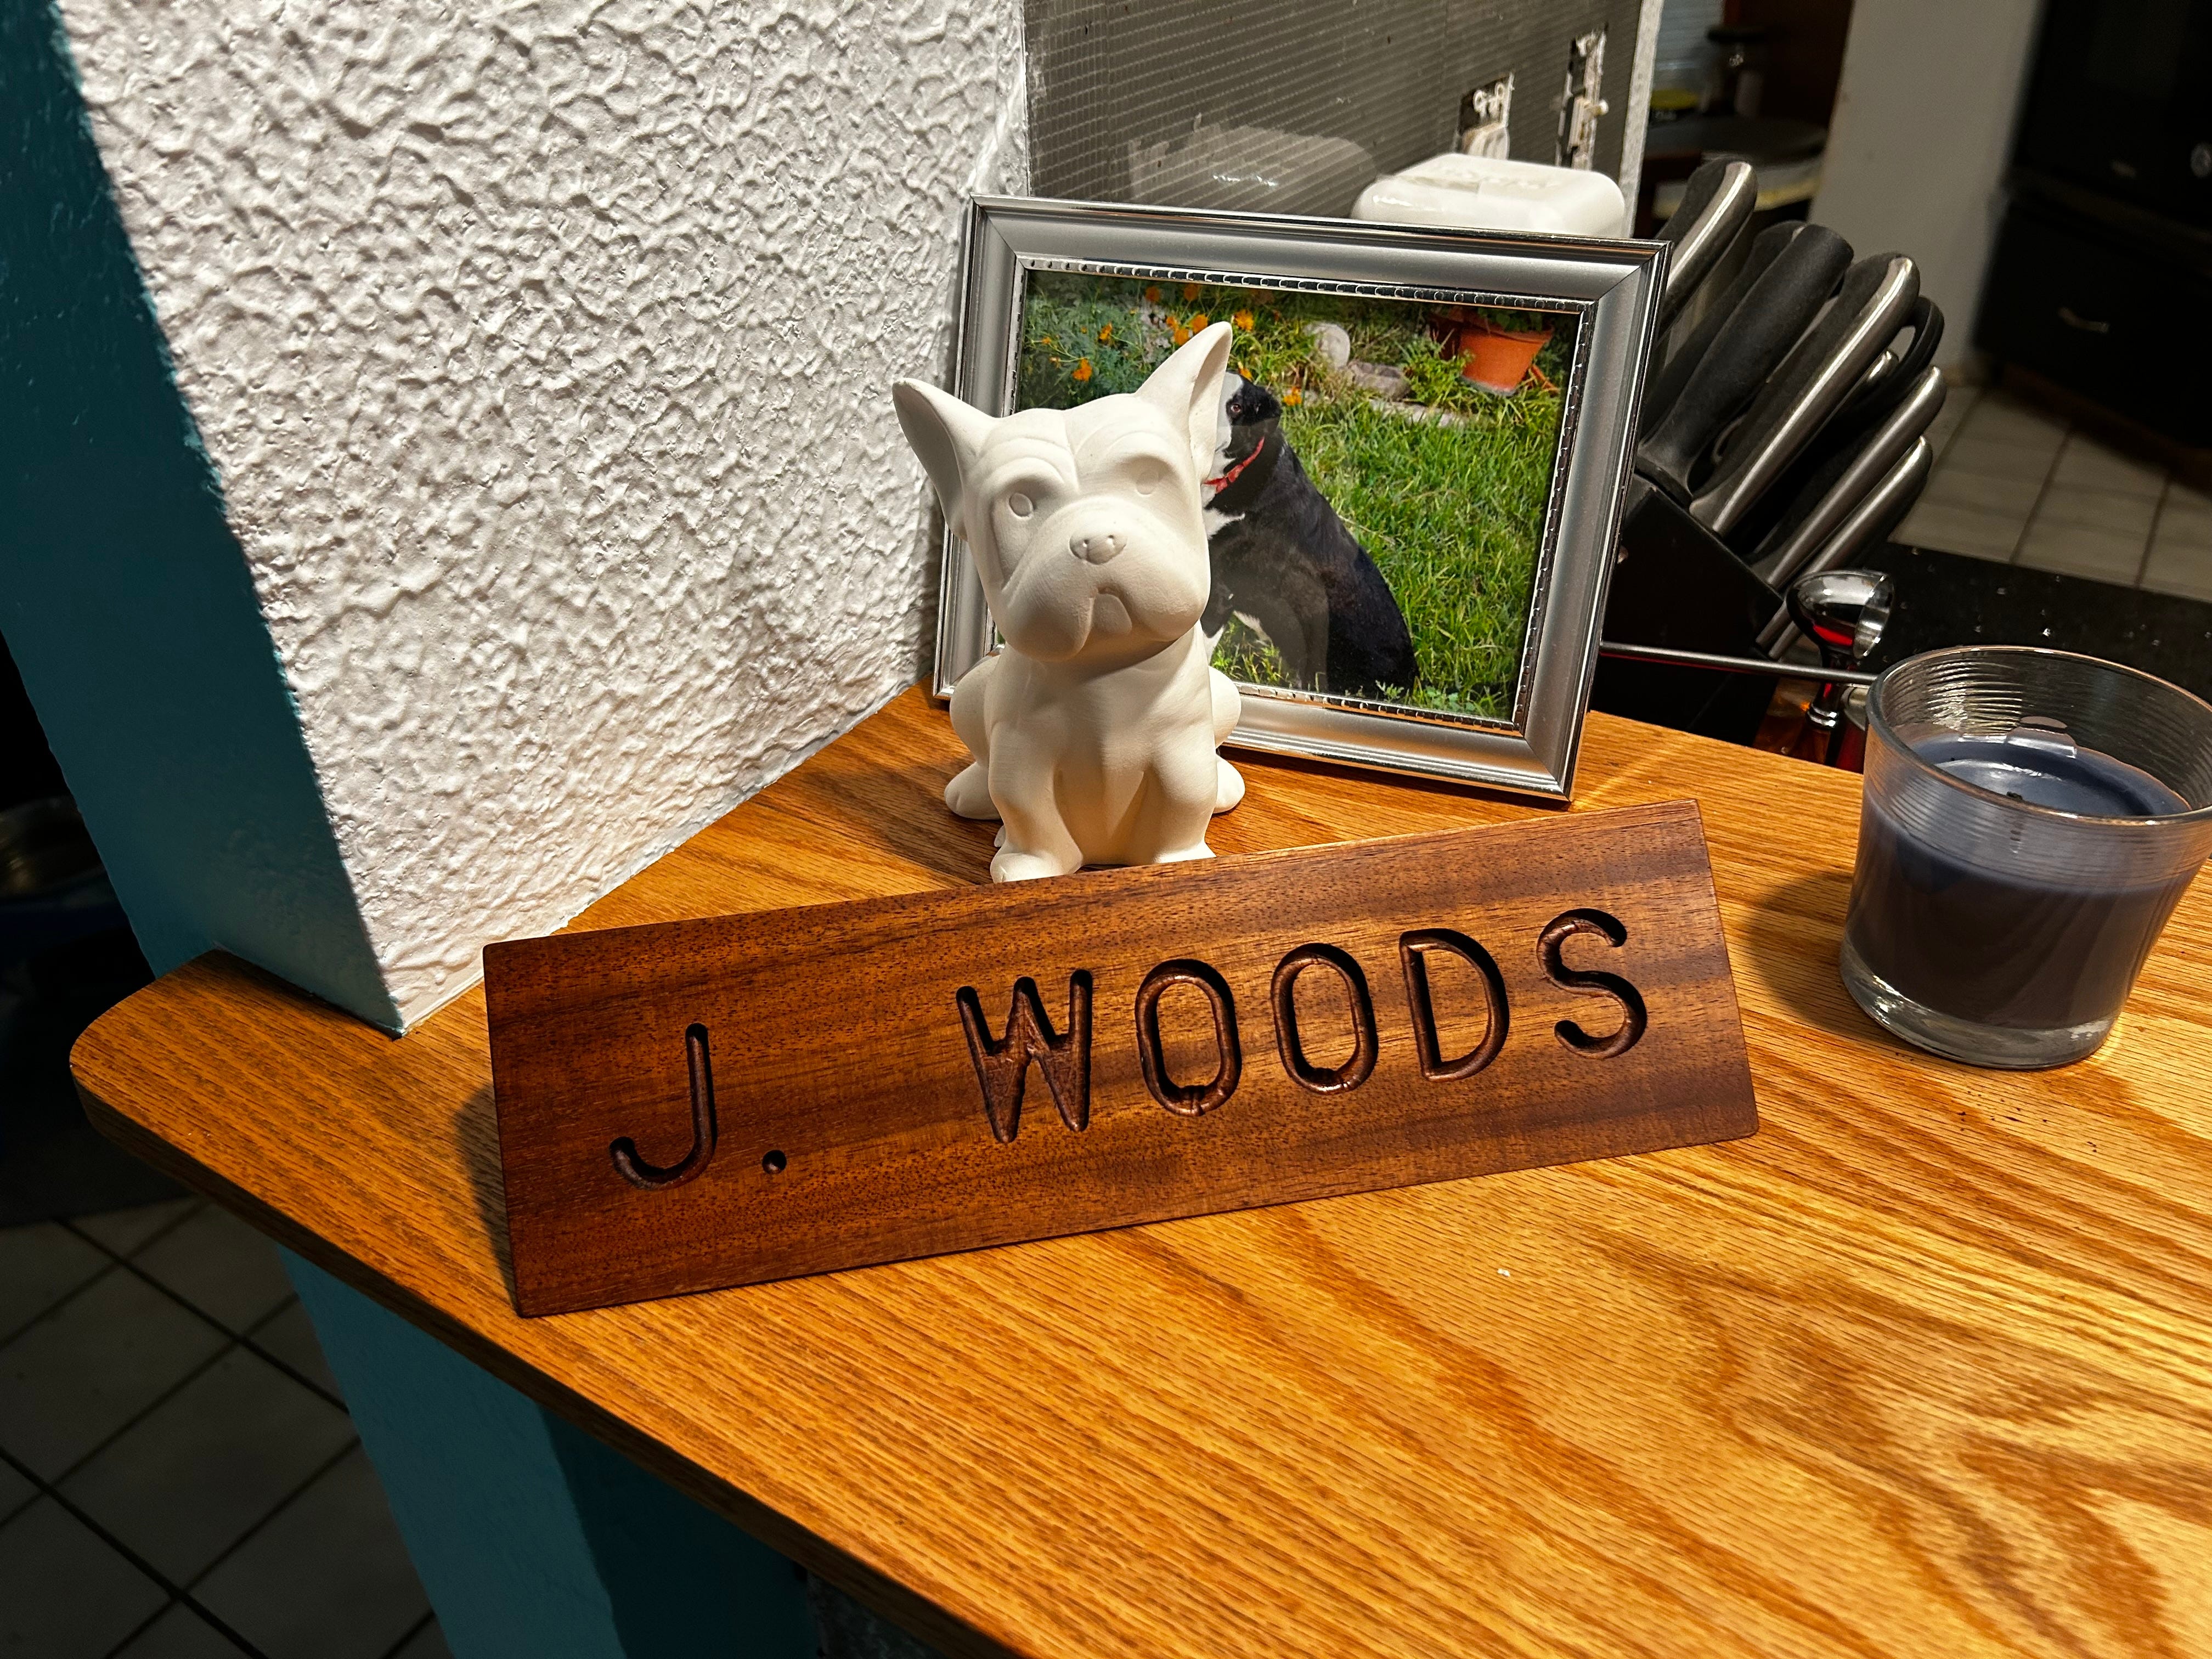
The completed desk nameplate. The grain in the mahogany is lustrous and defined with 2 coats of hand-rubbed teak oil.
My Opinion?
I’m glad I bought this Rockler Sign Making Template Kit for this project. If it generates any demand for additional orders (these things often do), this kit is sturdy enough for some production work.
When I first opened the box I thought the order didn’t make any sense. What that turned out to be is that the width of the individual pieces are so varied that the box was packed for efficiency, not logic. For example, the letter ‘W’ looks at first glance to be too wide but it’s just right. All 99 pieces are there.
If you want to make a larger sign requiring a larger font, 2.25” kits and 3.38”kits are also available in the same State Park font.
Hopefully, my experience with this kit and my graduation gift project have helped or inspired you and helped with a buying decision. Let me know! Subscribe below for more from the Insomniac Workshop.

More Content?
Homemade Probiotic Yogurt Refrigerator Oatmeal — kitchen how-to
How to Sharpen Knives to a Razor’s Edge — product review and instruction
Practice Mindfulness — podcast
Know Before Who You Stand — podcast
Bet on Simplicity — podcast
Power Lines — short story